Quilt Along — 5 Min Read
Kaleidoscope Bed Runner Quilt Along
Kaleidoscope Bed Runner Quilt Along
A fun quilt along with Fat Quarter Shop!
After I saw this striking pattern by Lori Holt, I couldn’t wait to make my own version, using a somewhat reverse color palette.
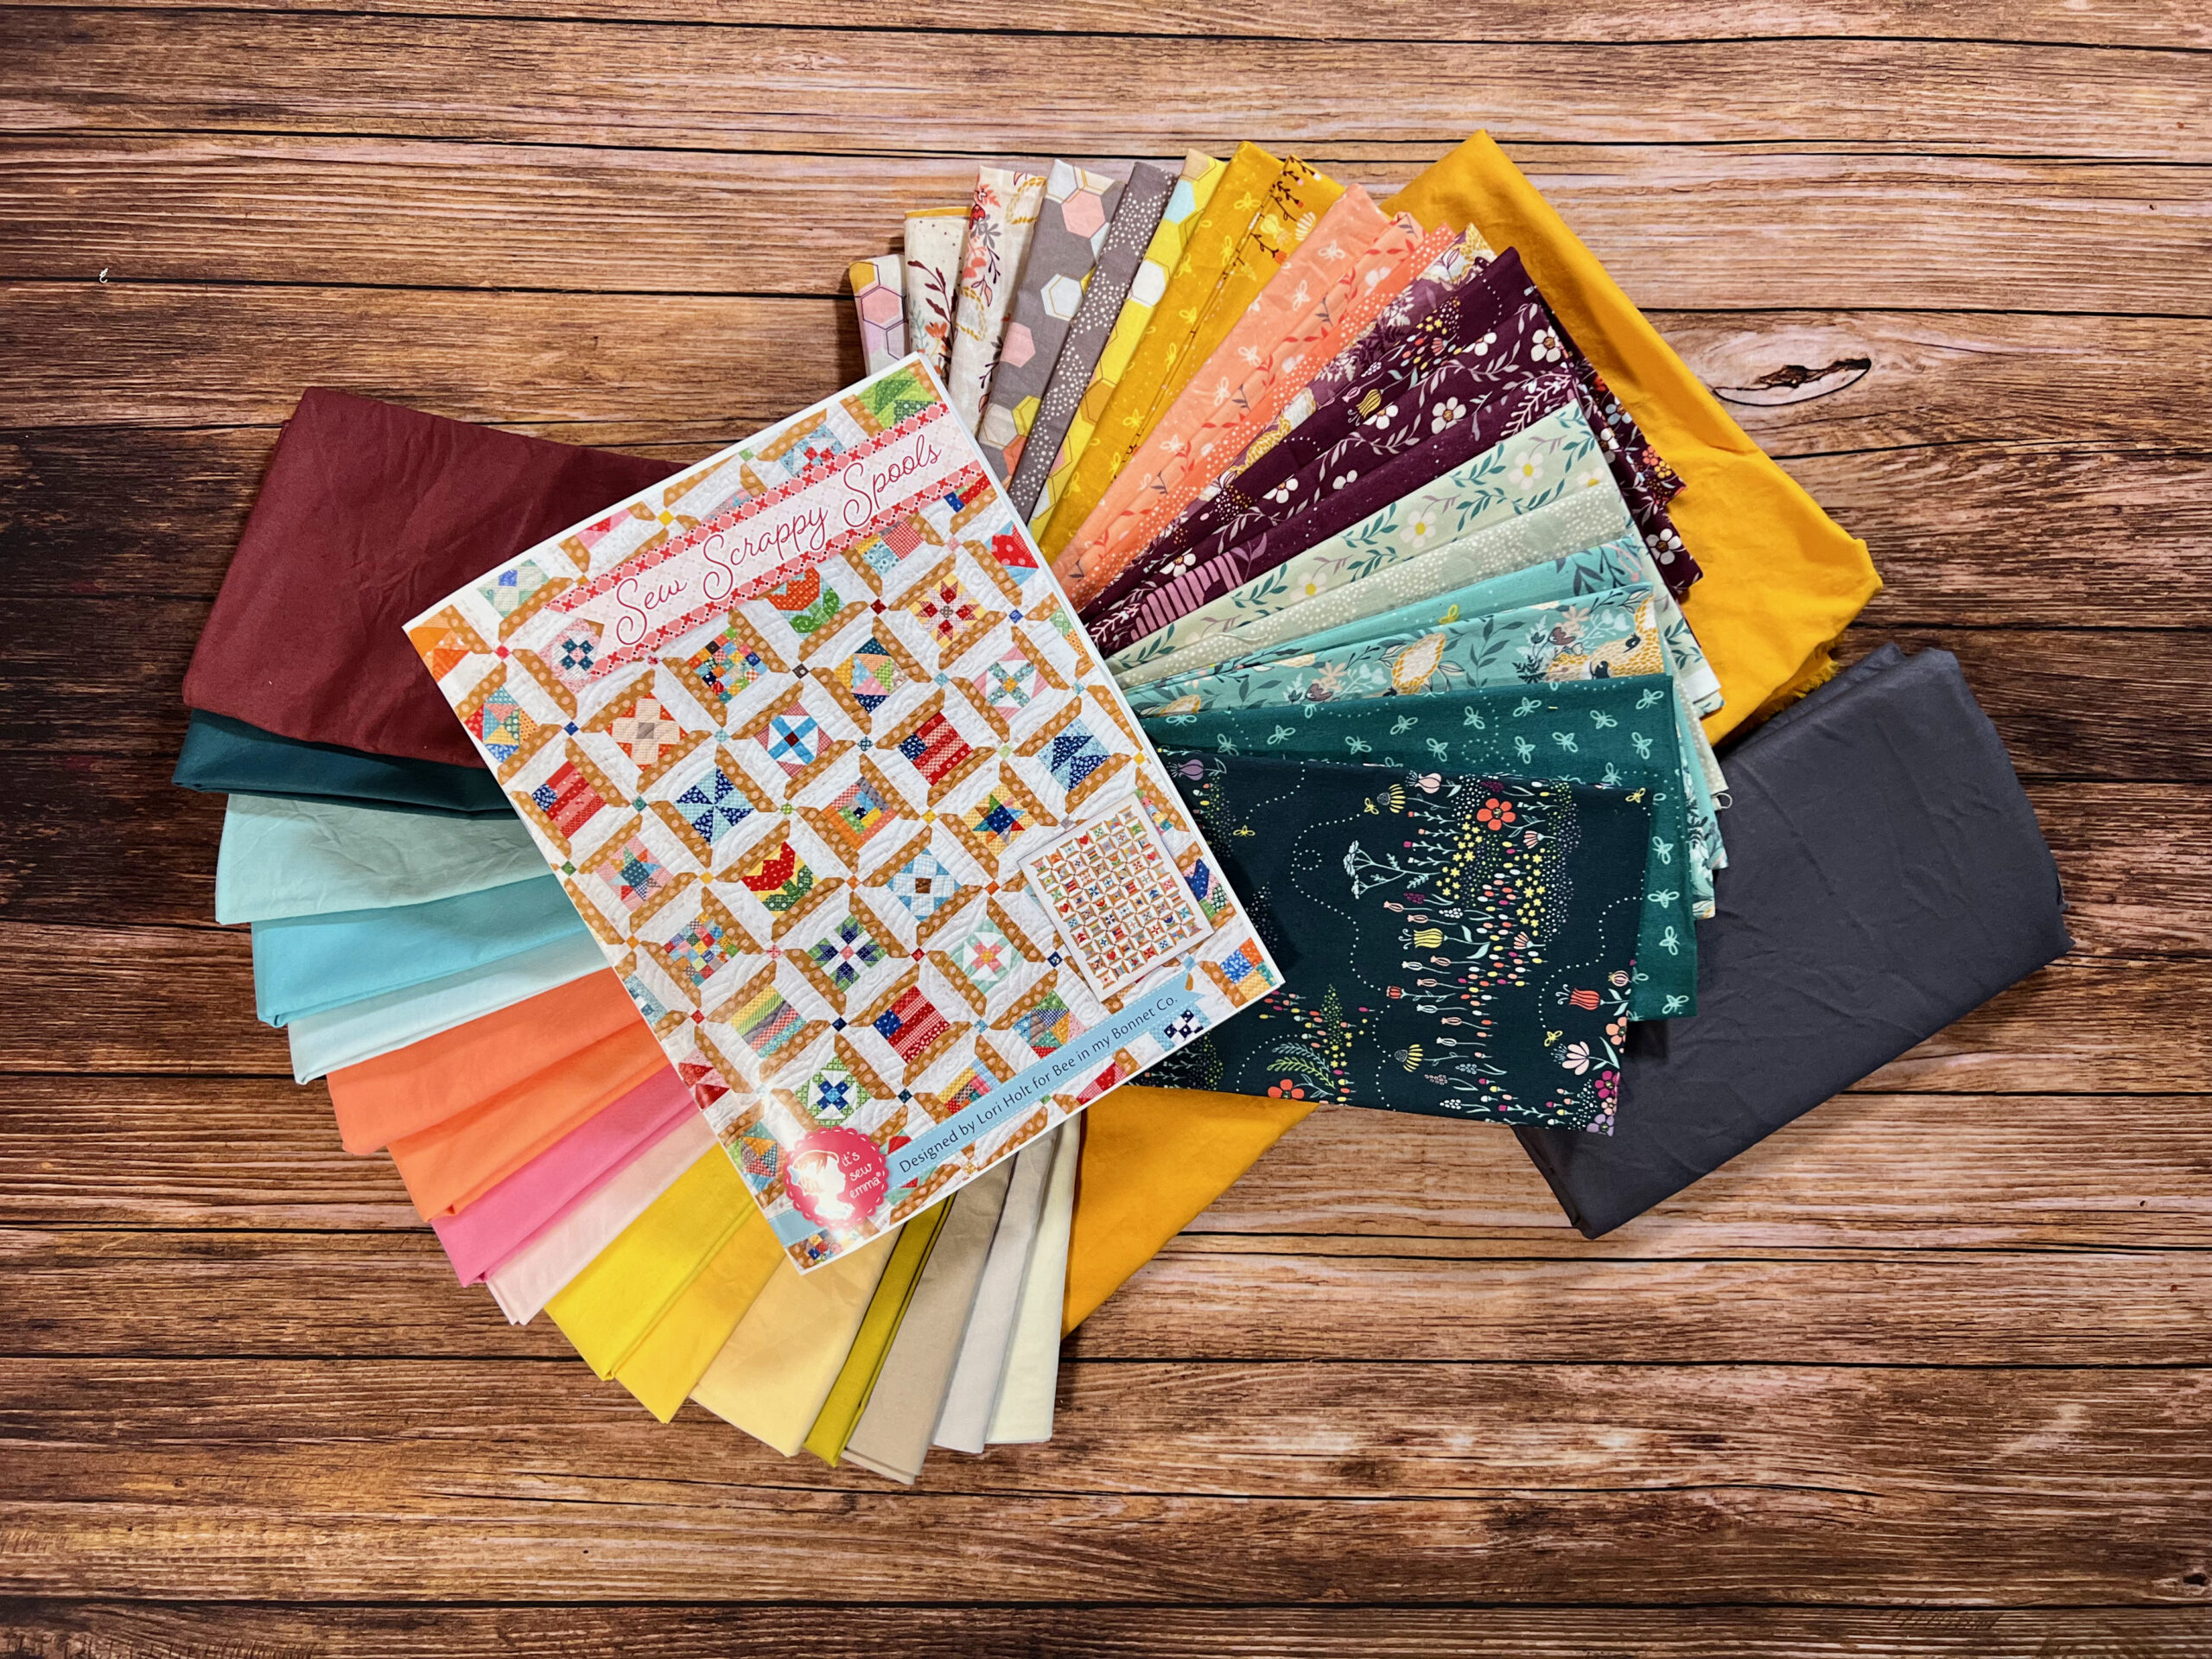
This project is a collaboration between Fat Quarter Shop and Lori Holt, and features blocks from one of her newest pattern books, Kaleidoscope (an It’s Sew Emma publication). The actual project is a quilt along, but also a stitch along, producing cross stitch versions of the same pattern. Make sure to checkout the quilt along on the Fat Quarter Shop.
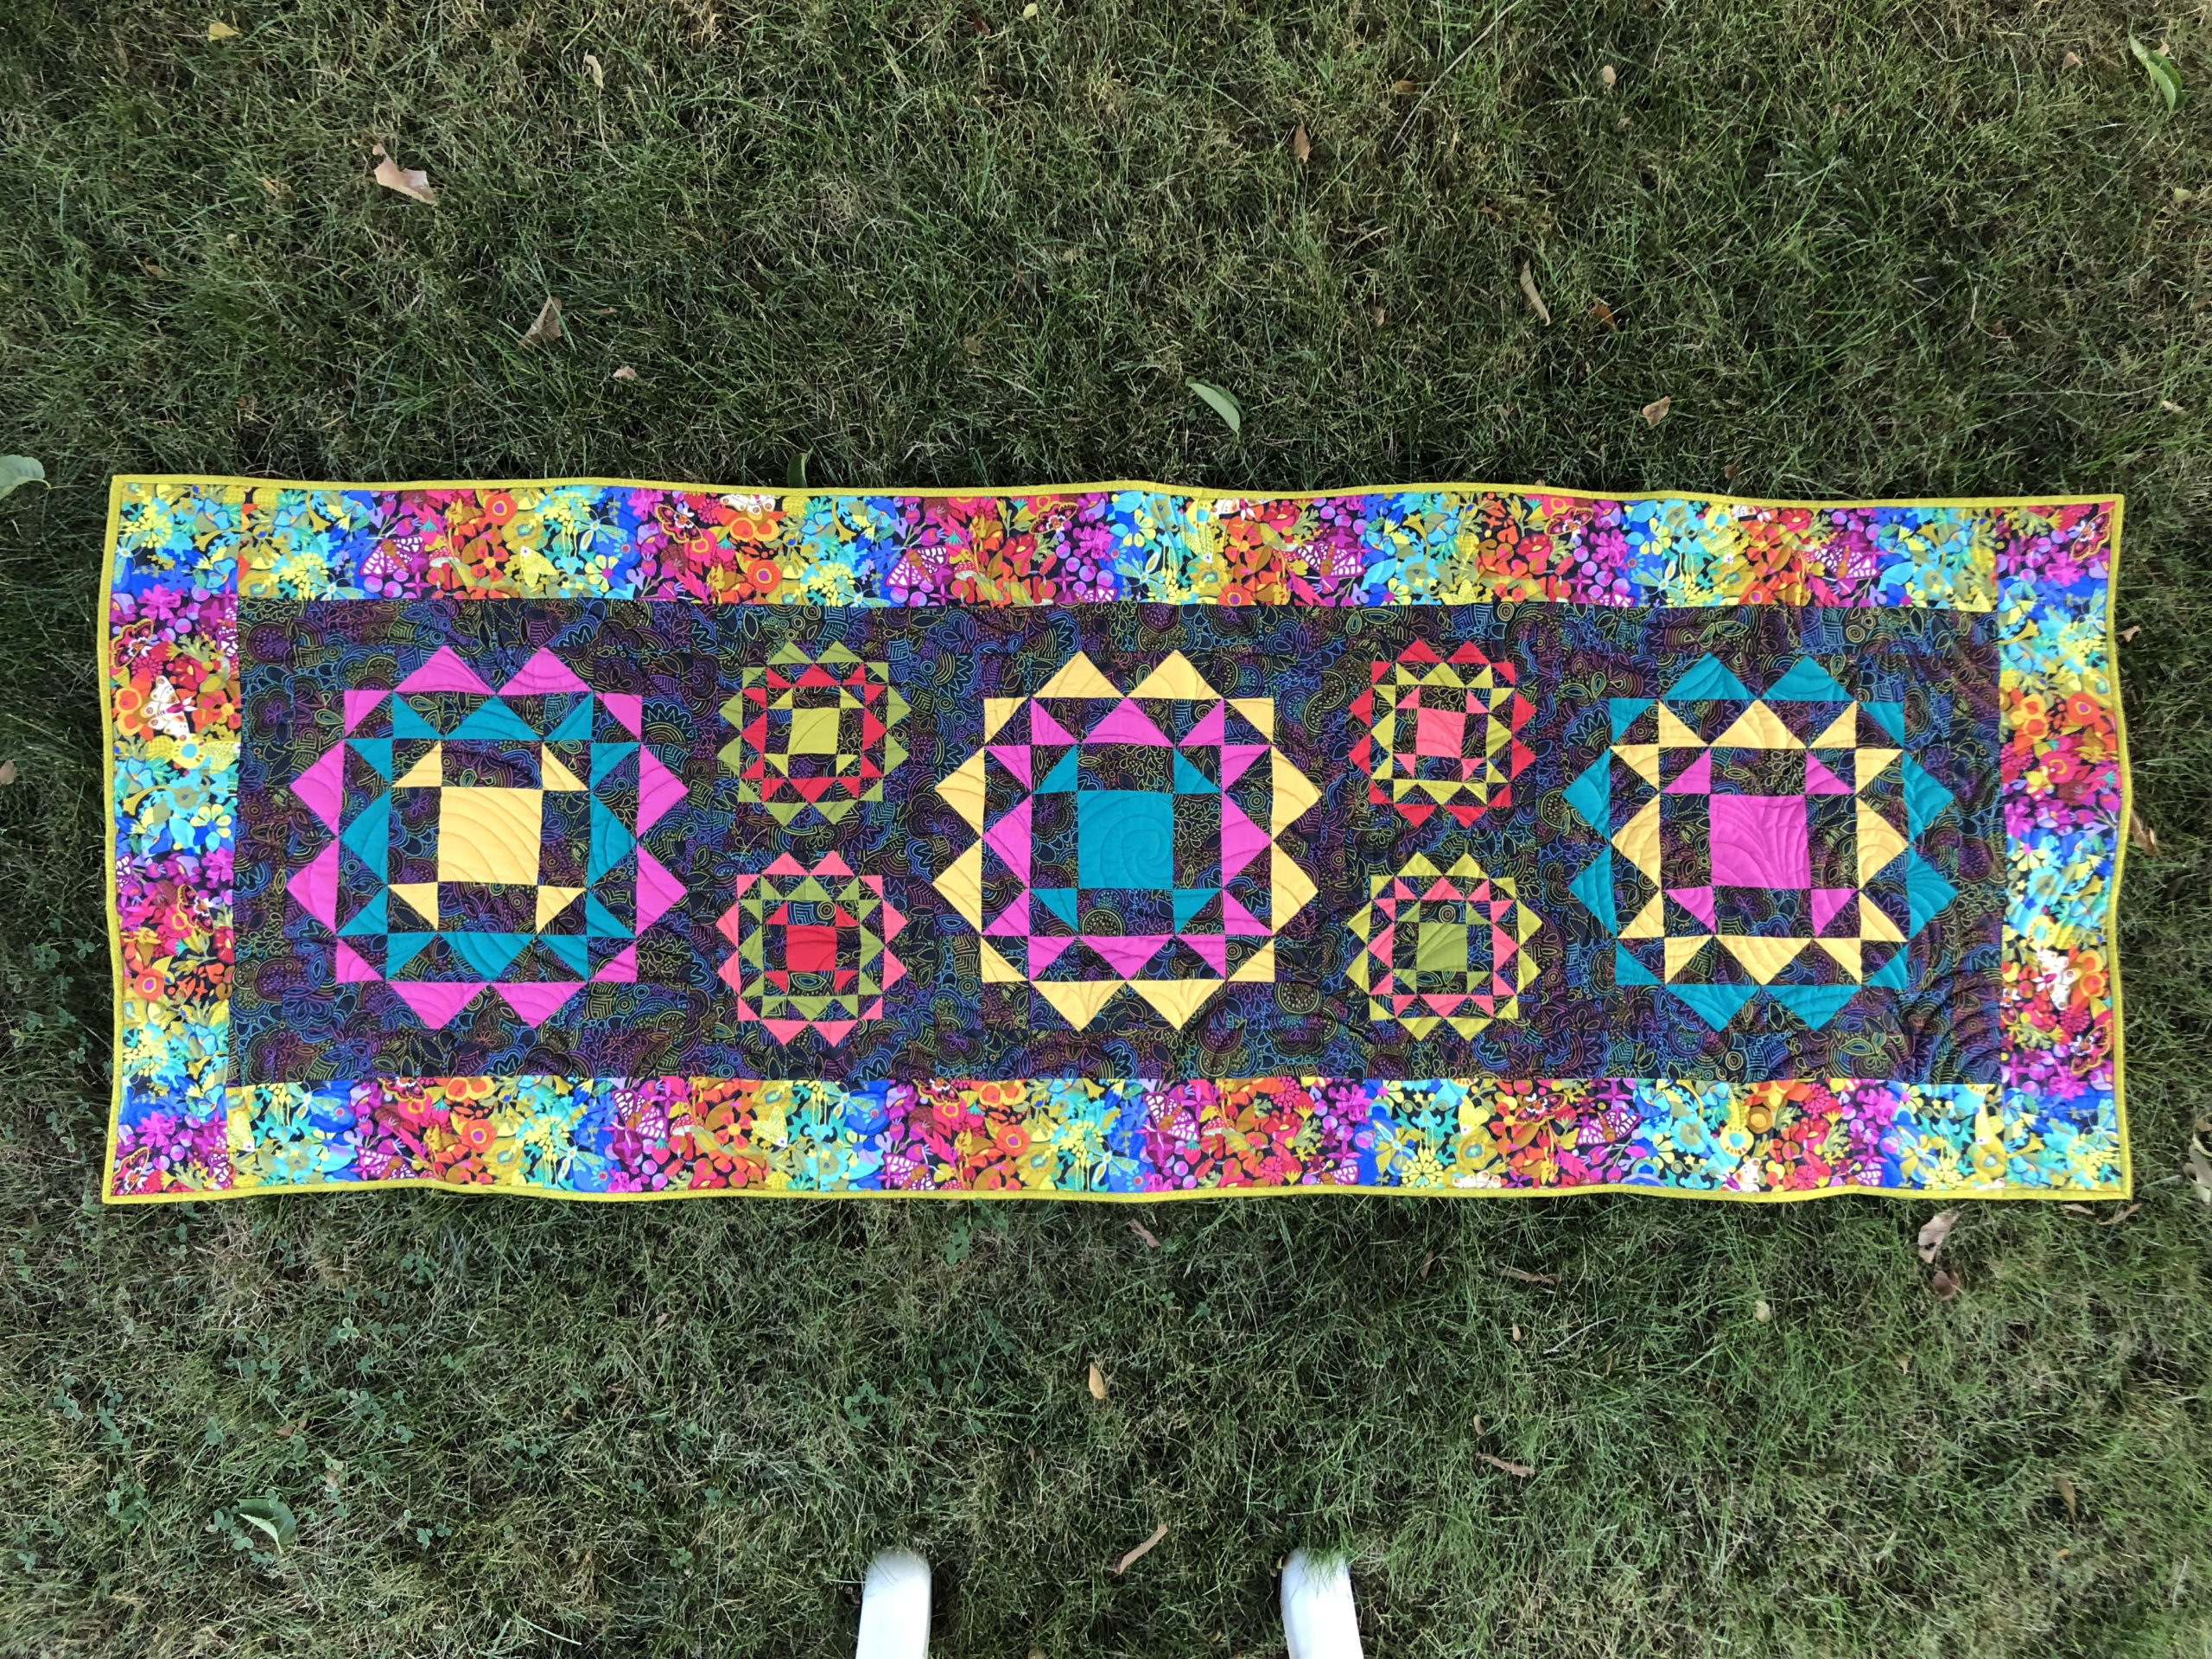
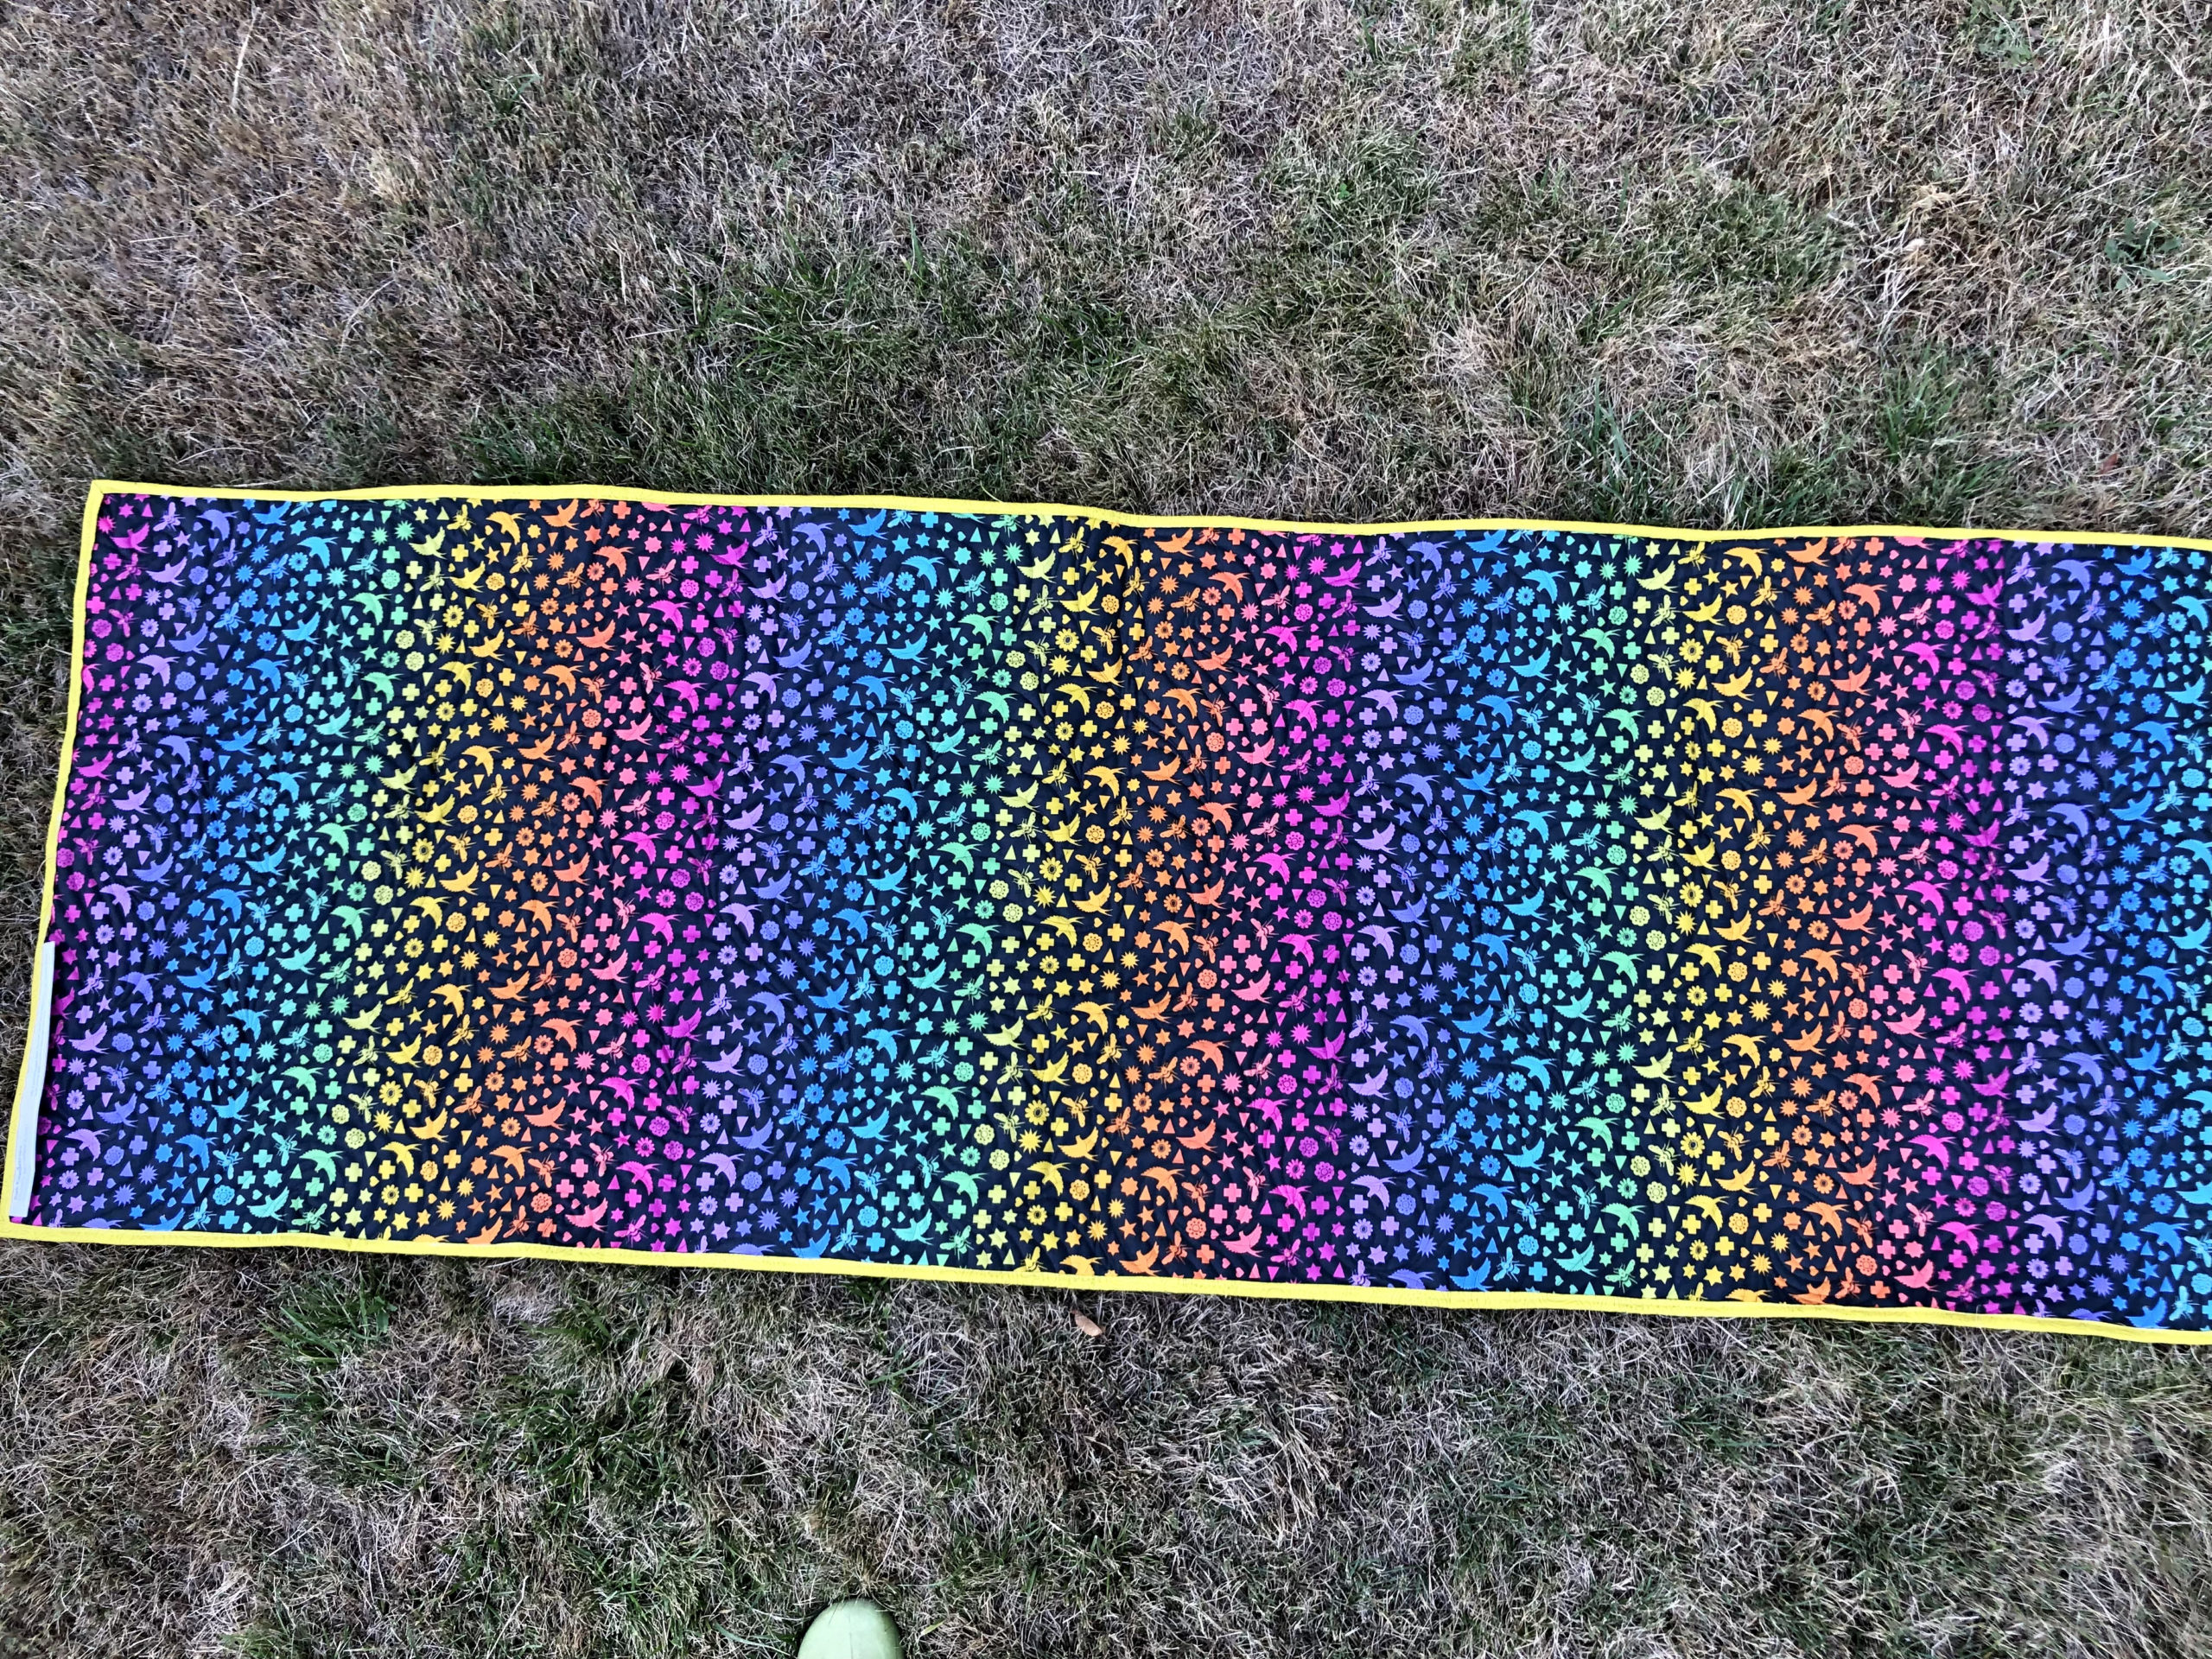
For the quilt along, I followed a free pattern, using the Kaleidoscope blocks to create a bed runner.
After agreeing to be one of the quilters featured in the sew along, I received the pattern instructions and began to review them.
The Project


Fabric Selection
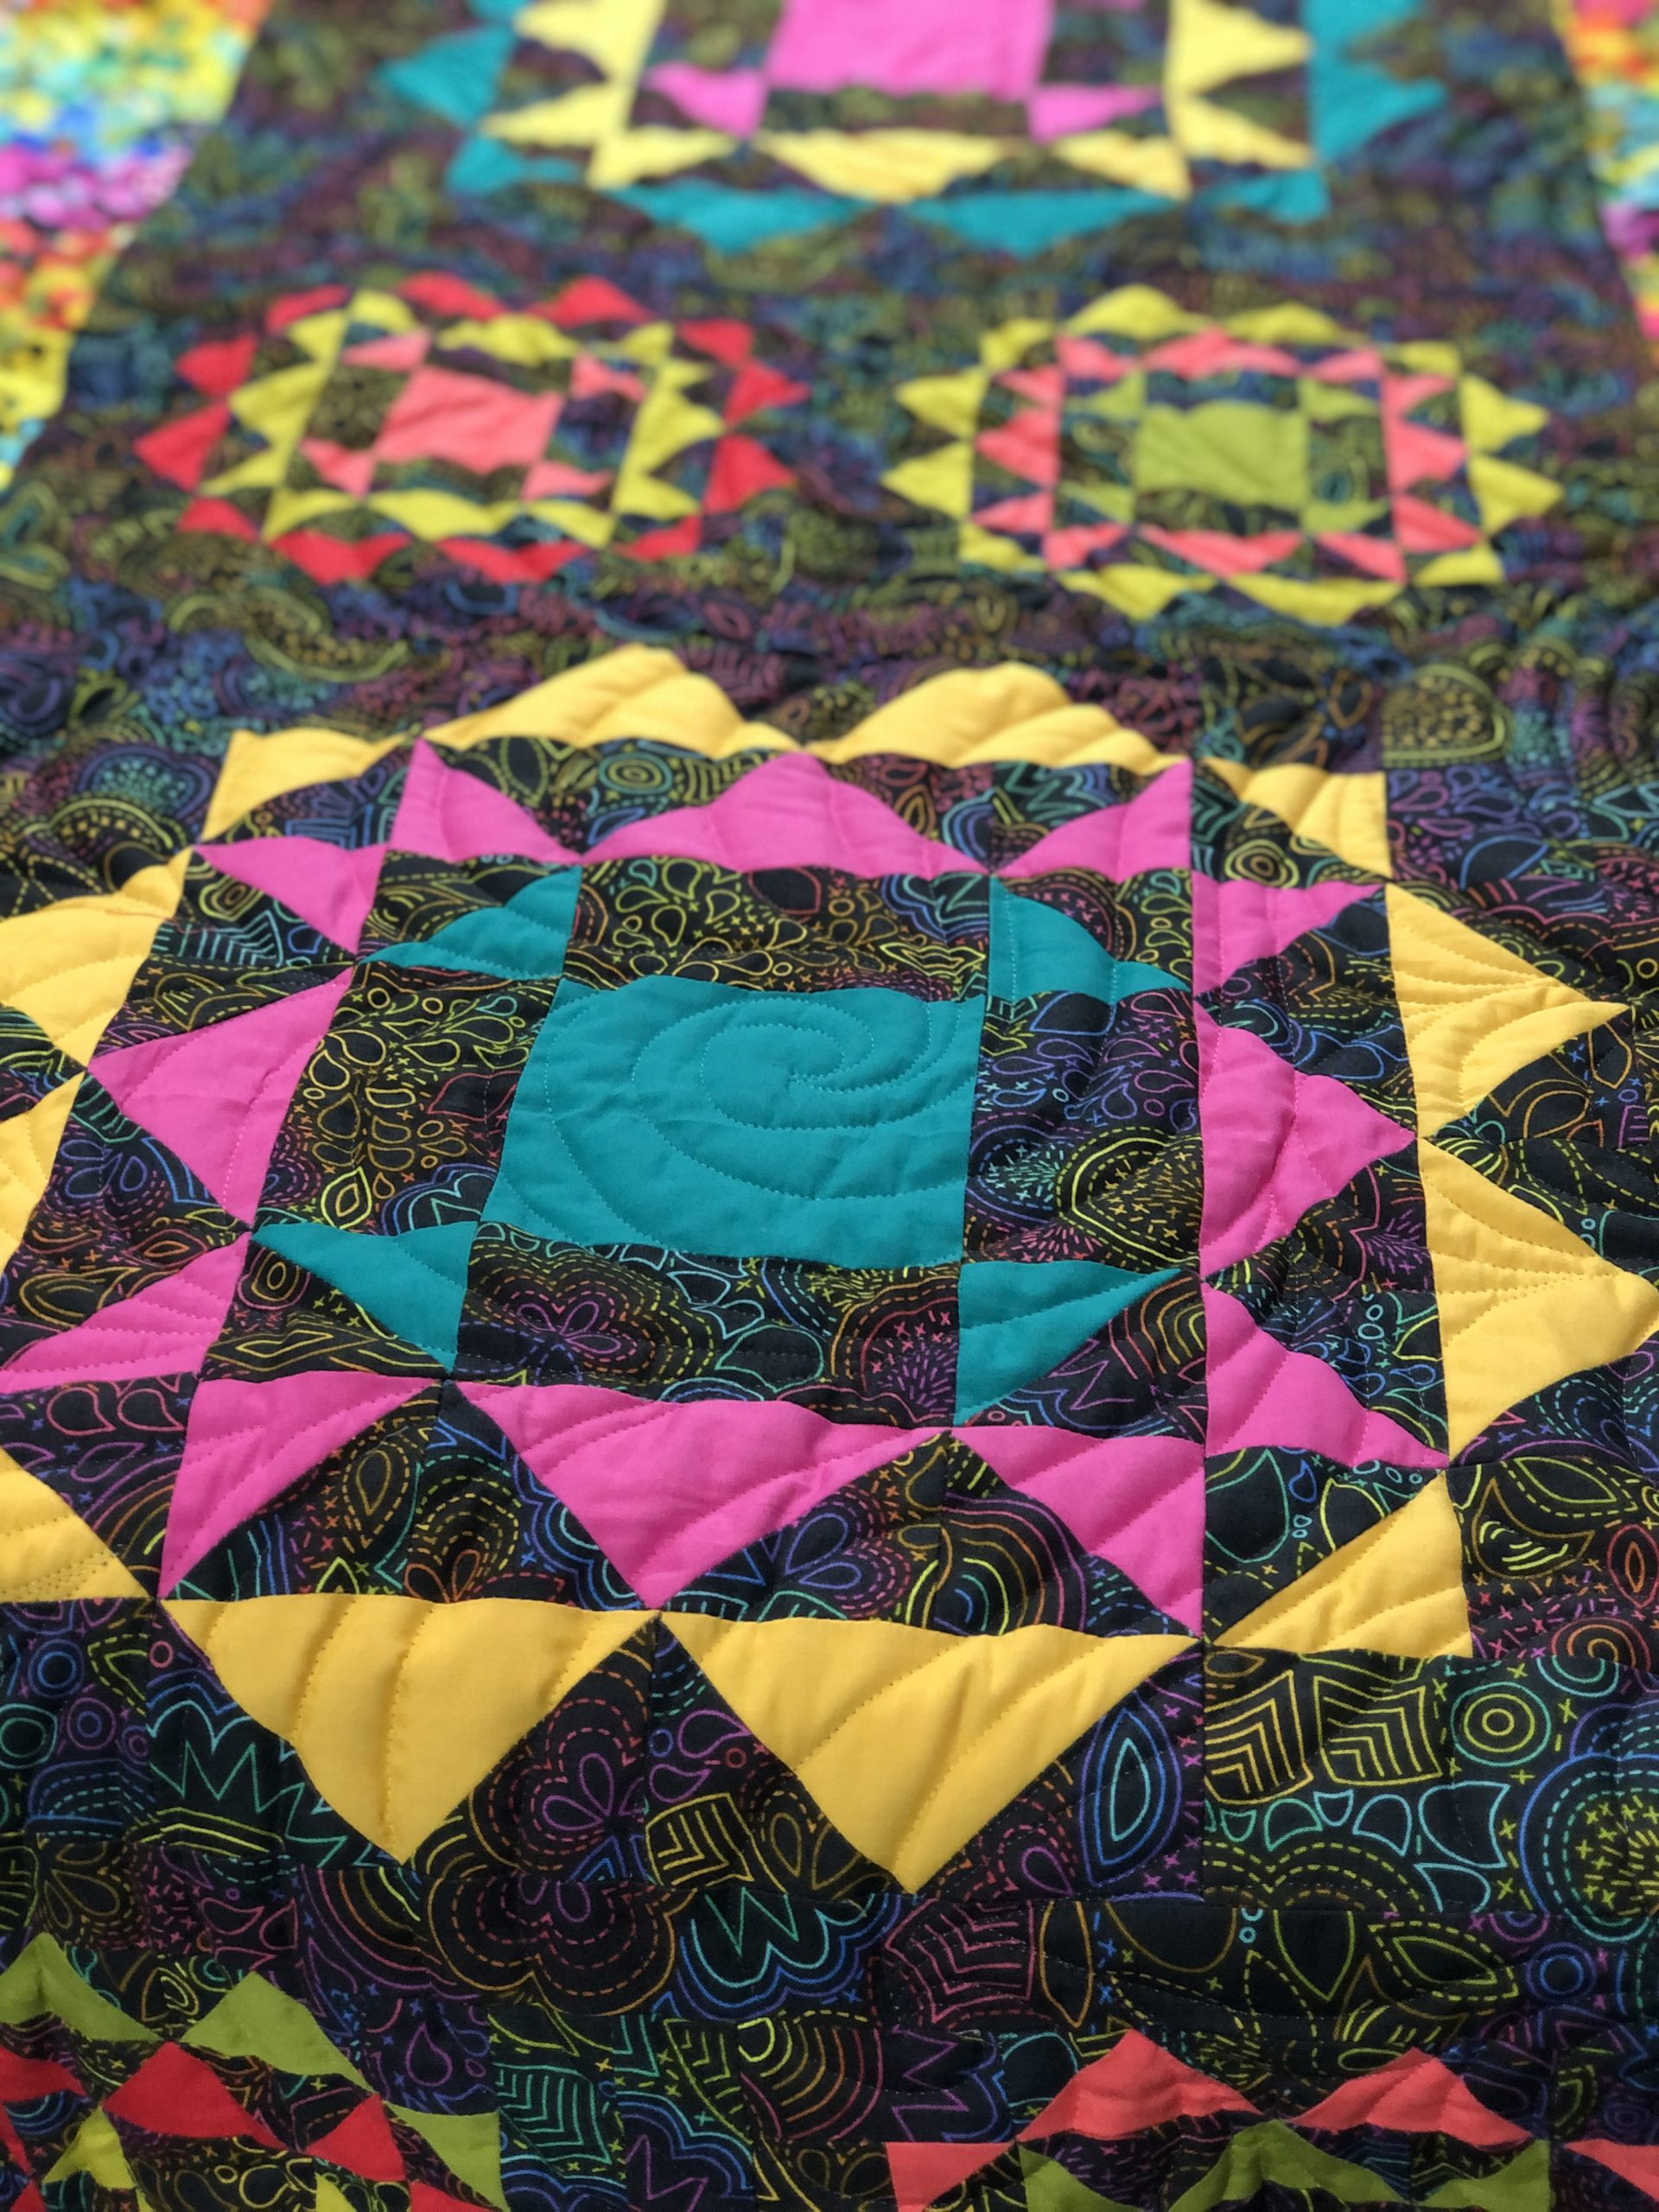
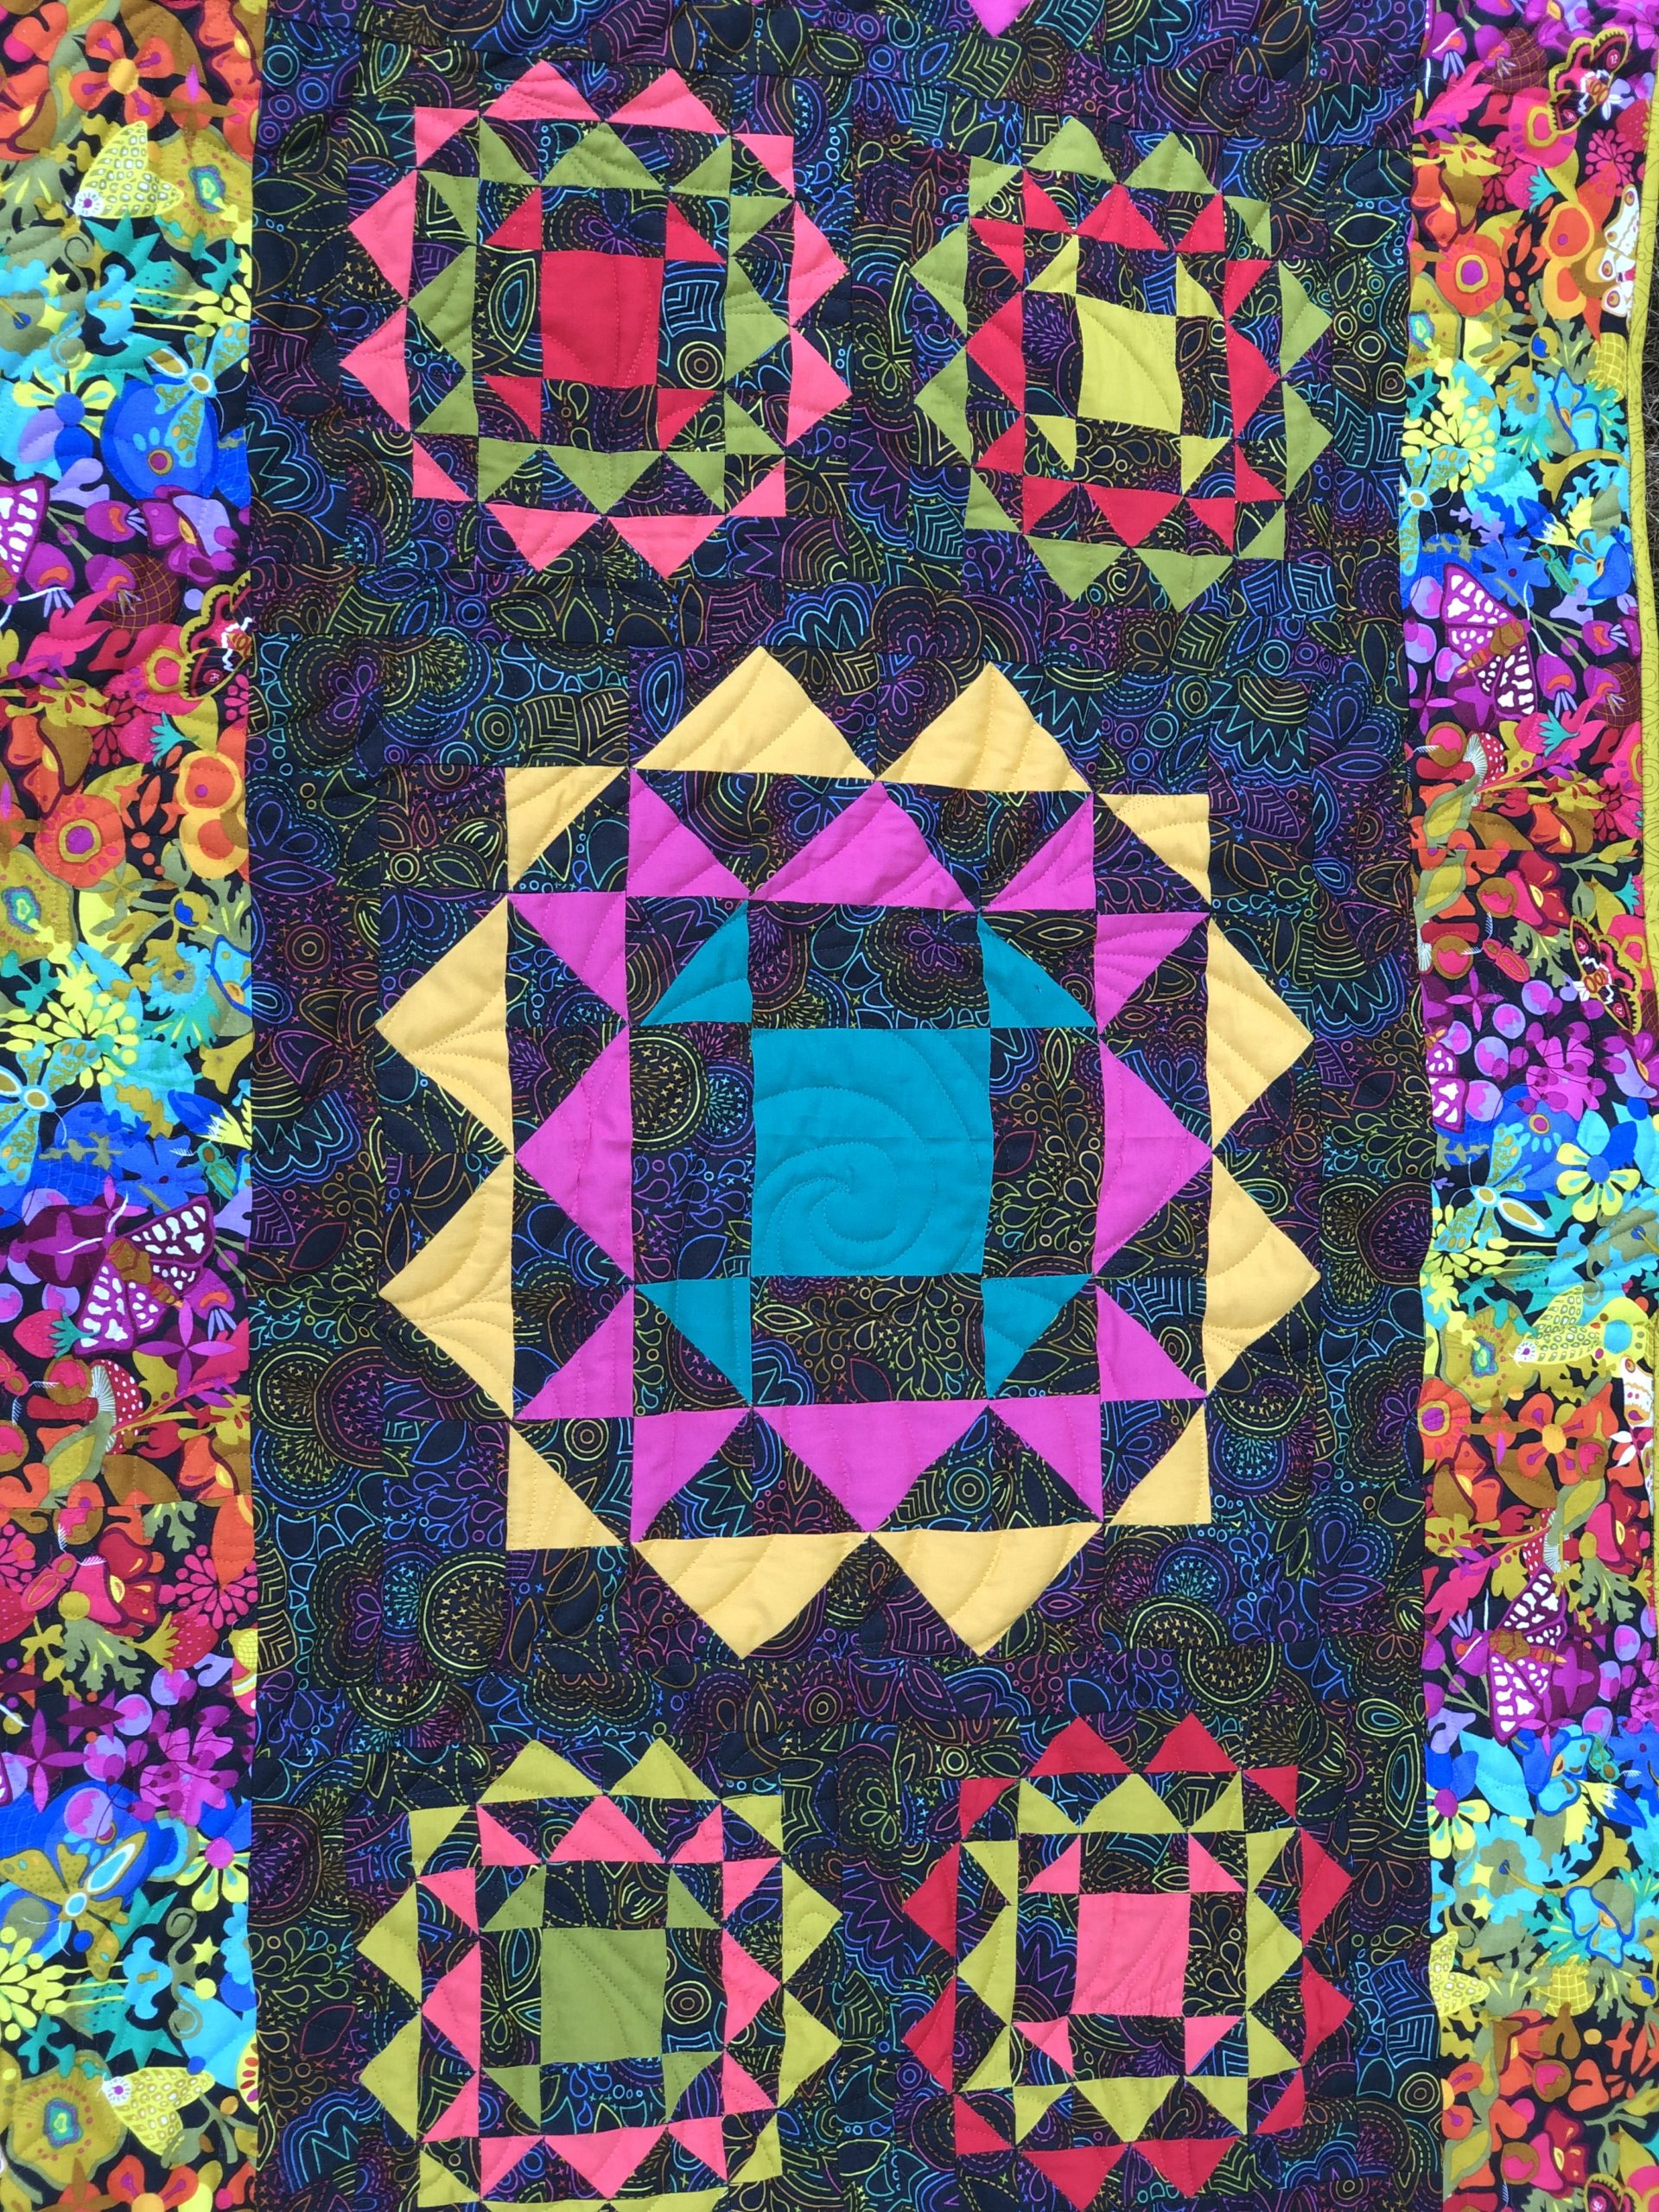
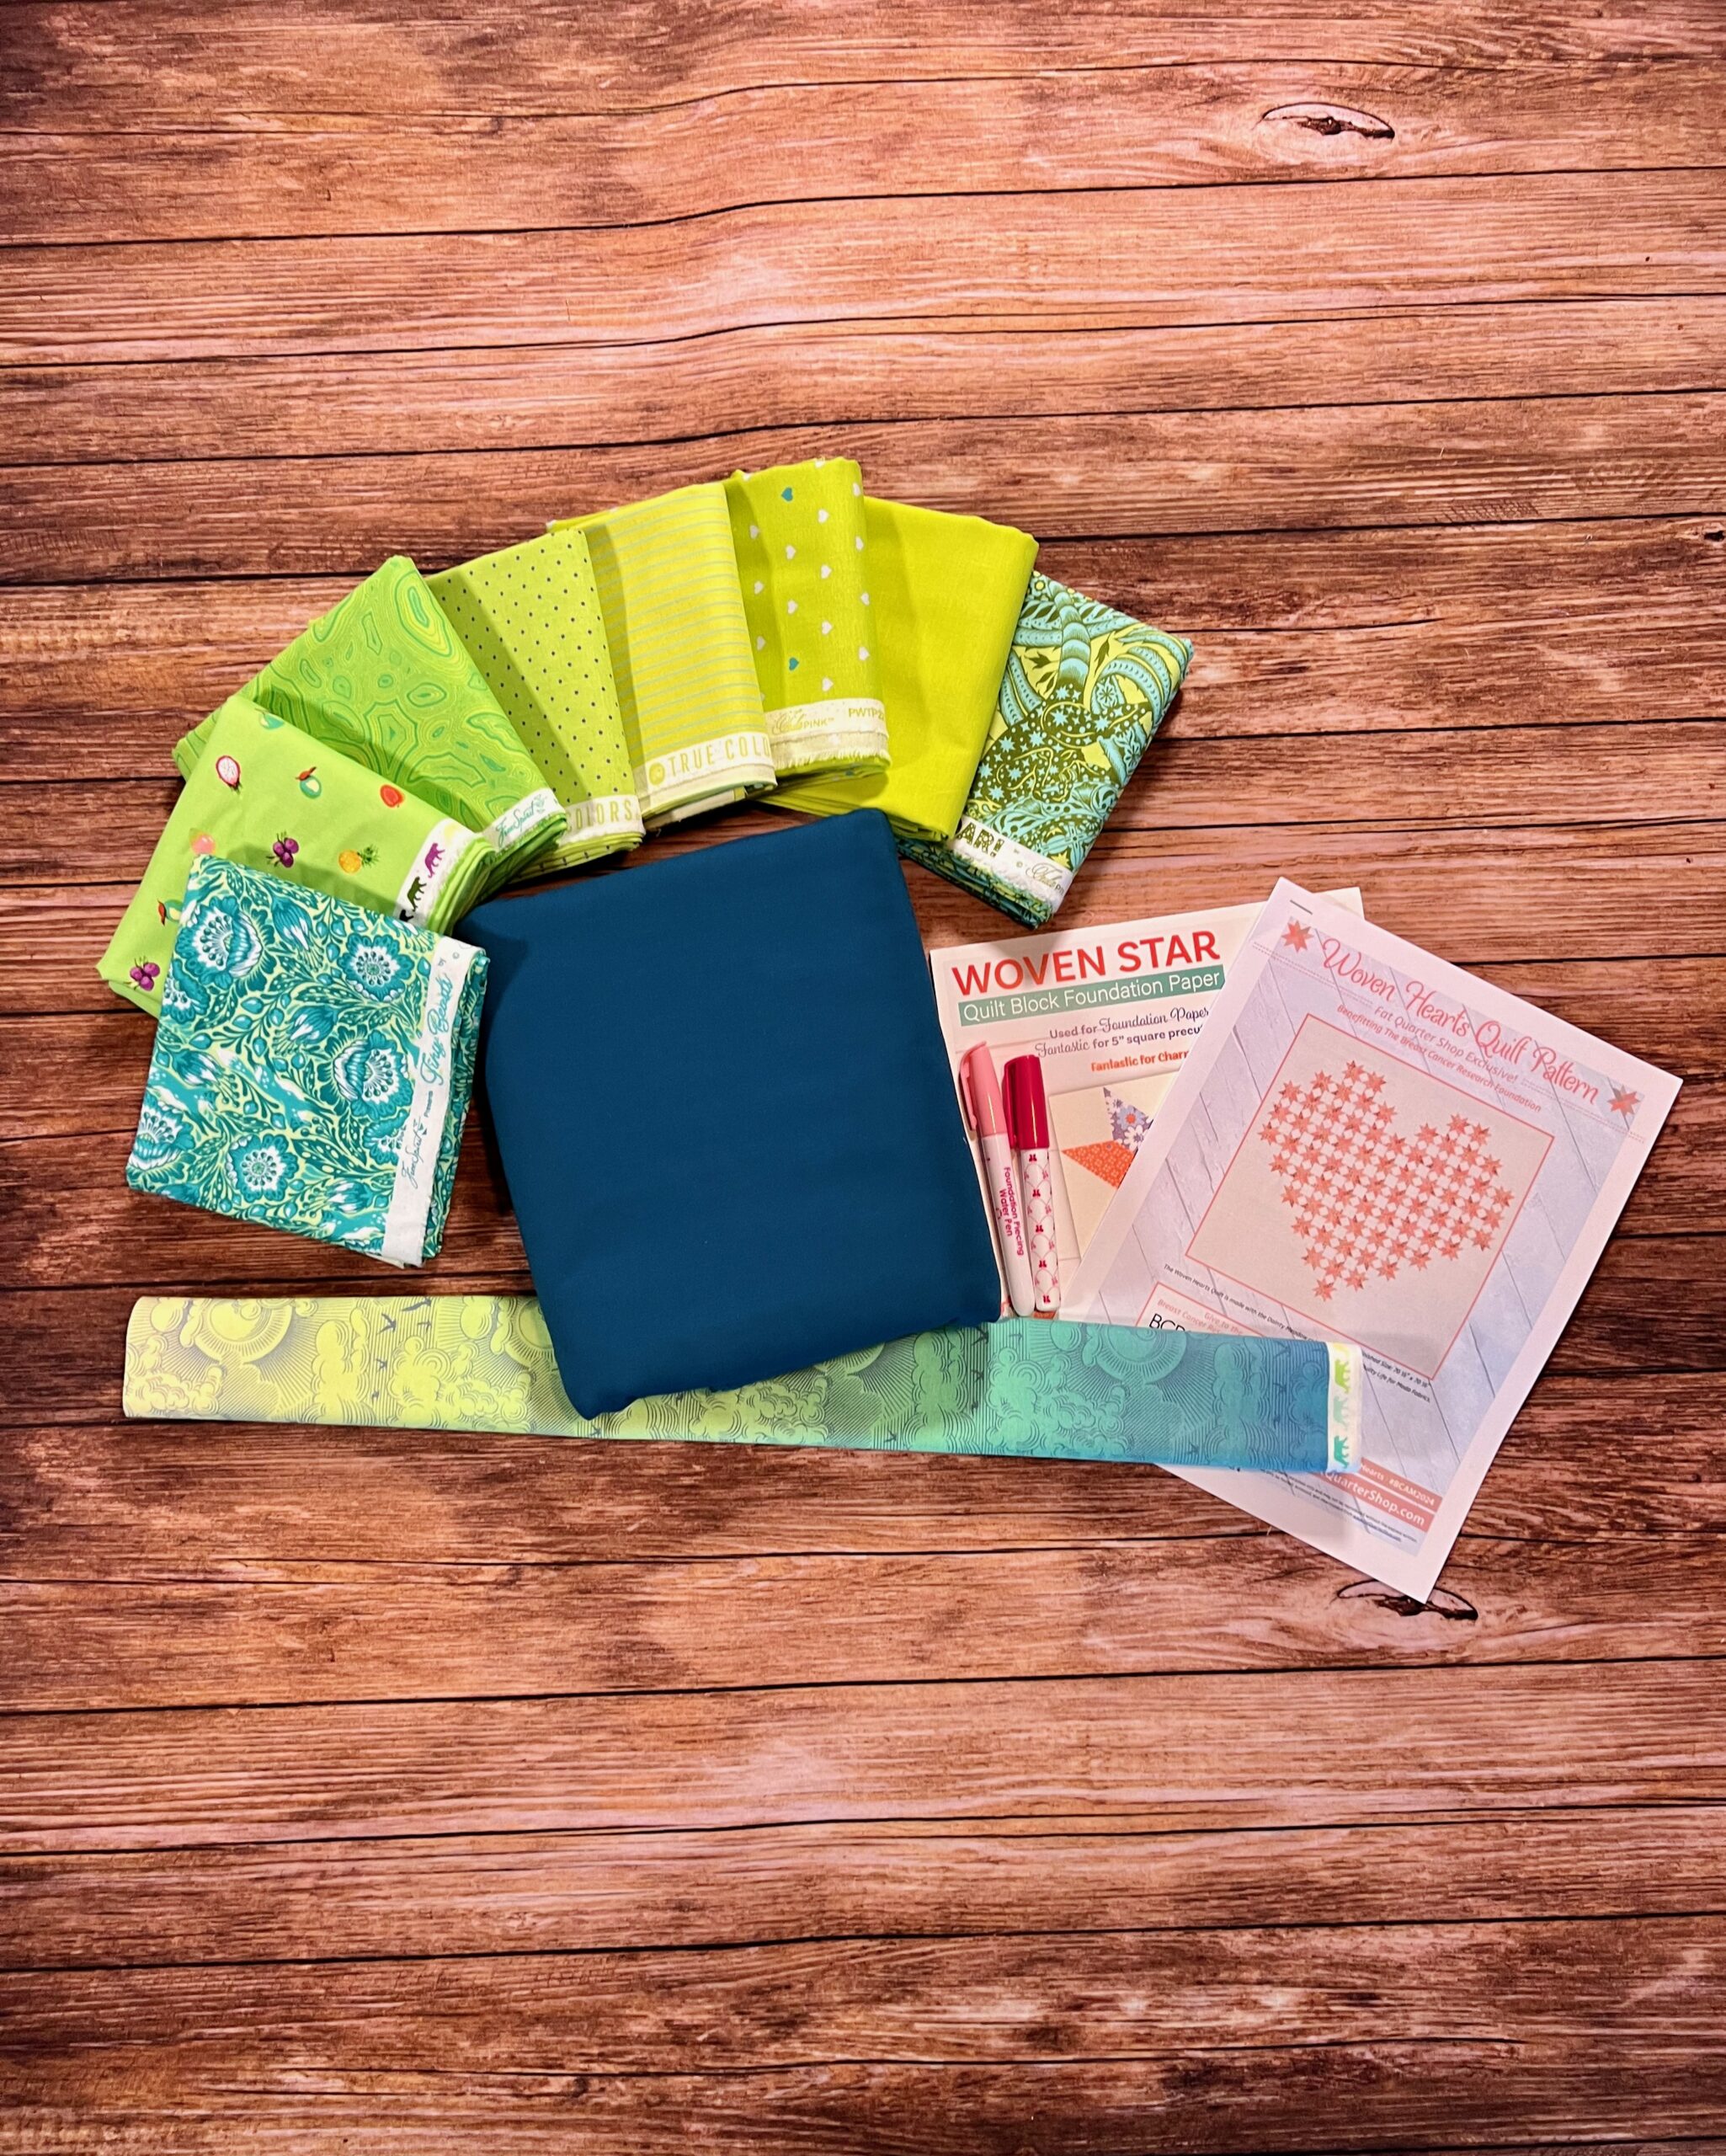
The examples shown used a white background and featured bright solids in the fabrics used in the star-shaped kaleidoscope blocks. I thought this would be a great opportunity to give a more modern feel while also taking the opportunity to cut into one of my favorite fabric designer’s (Alison Glass) newest fabric lines.
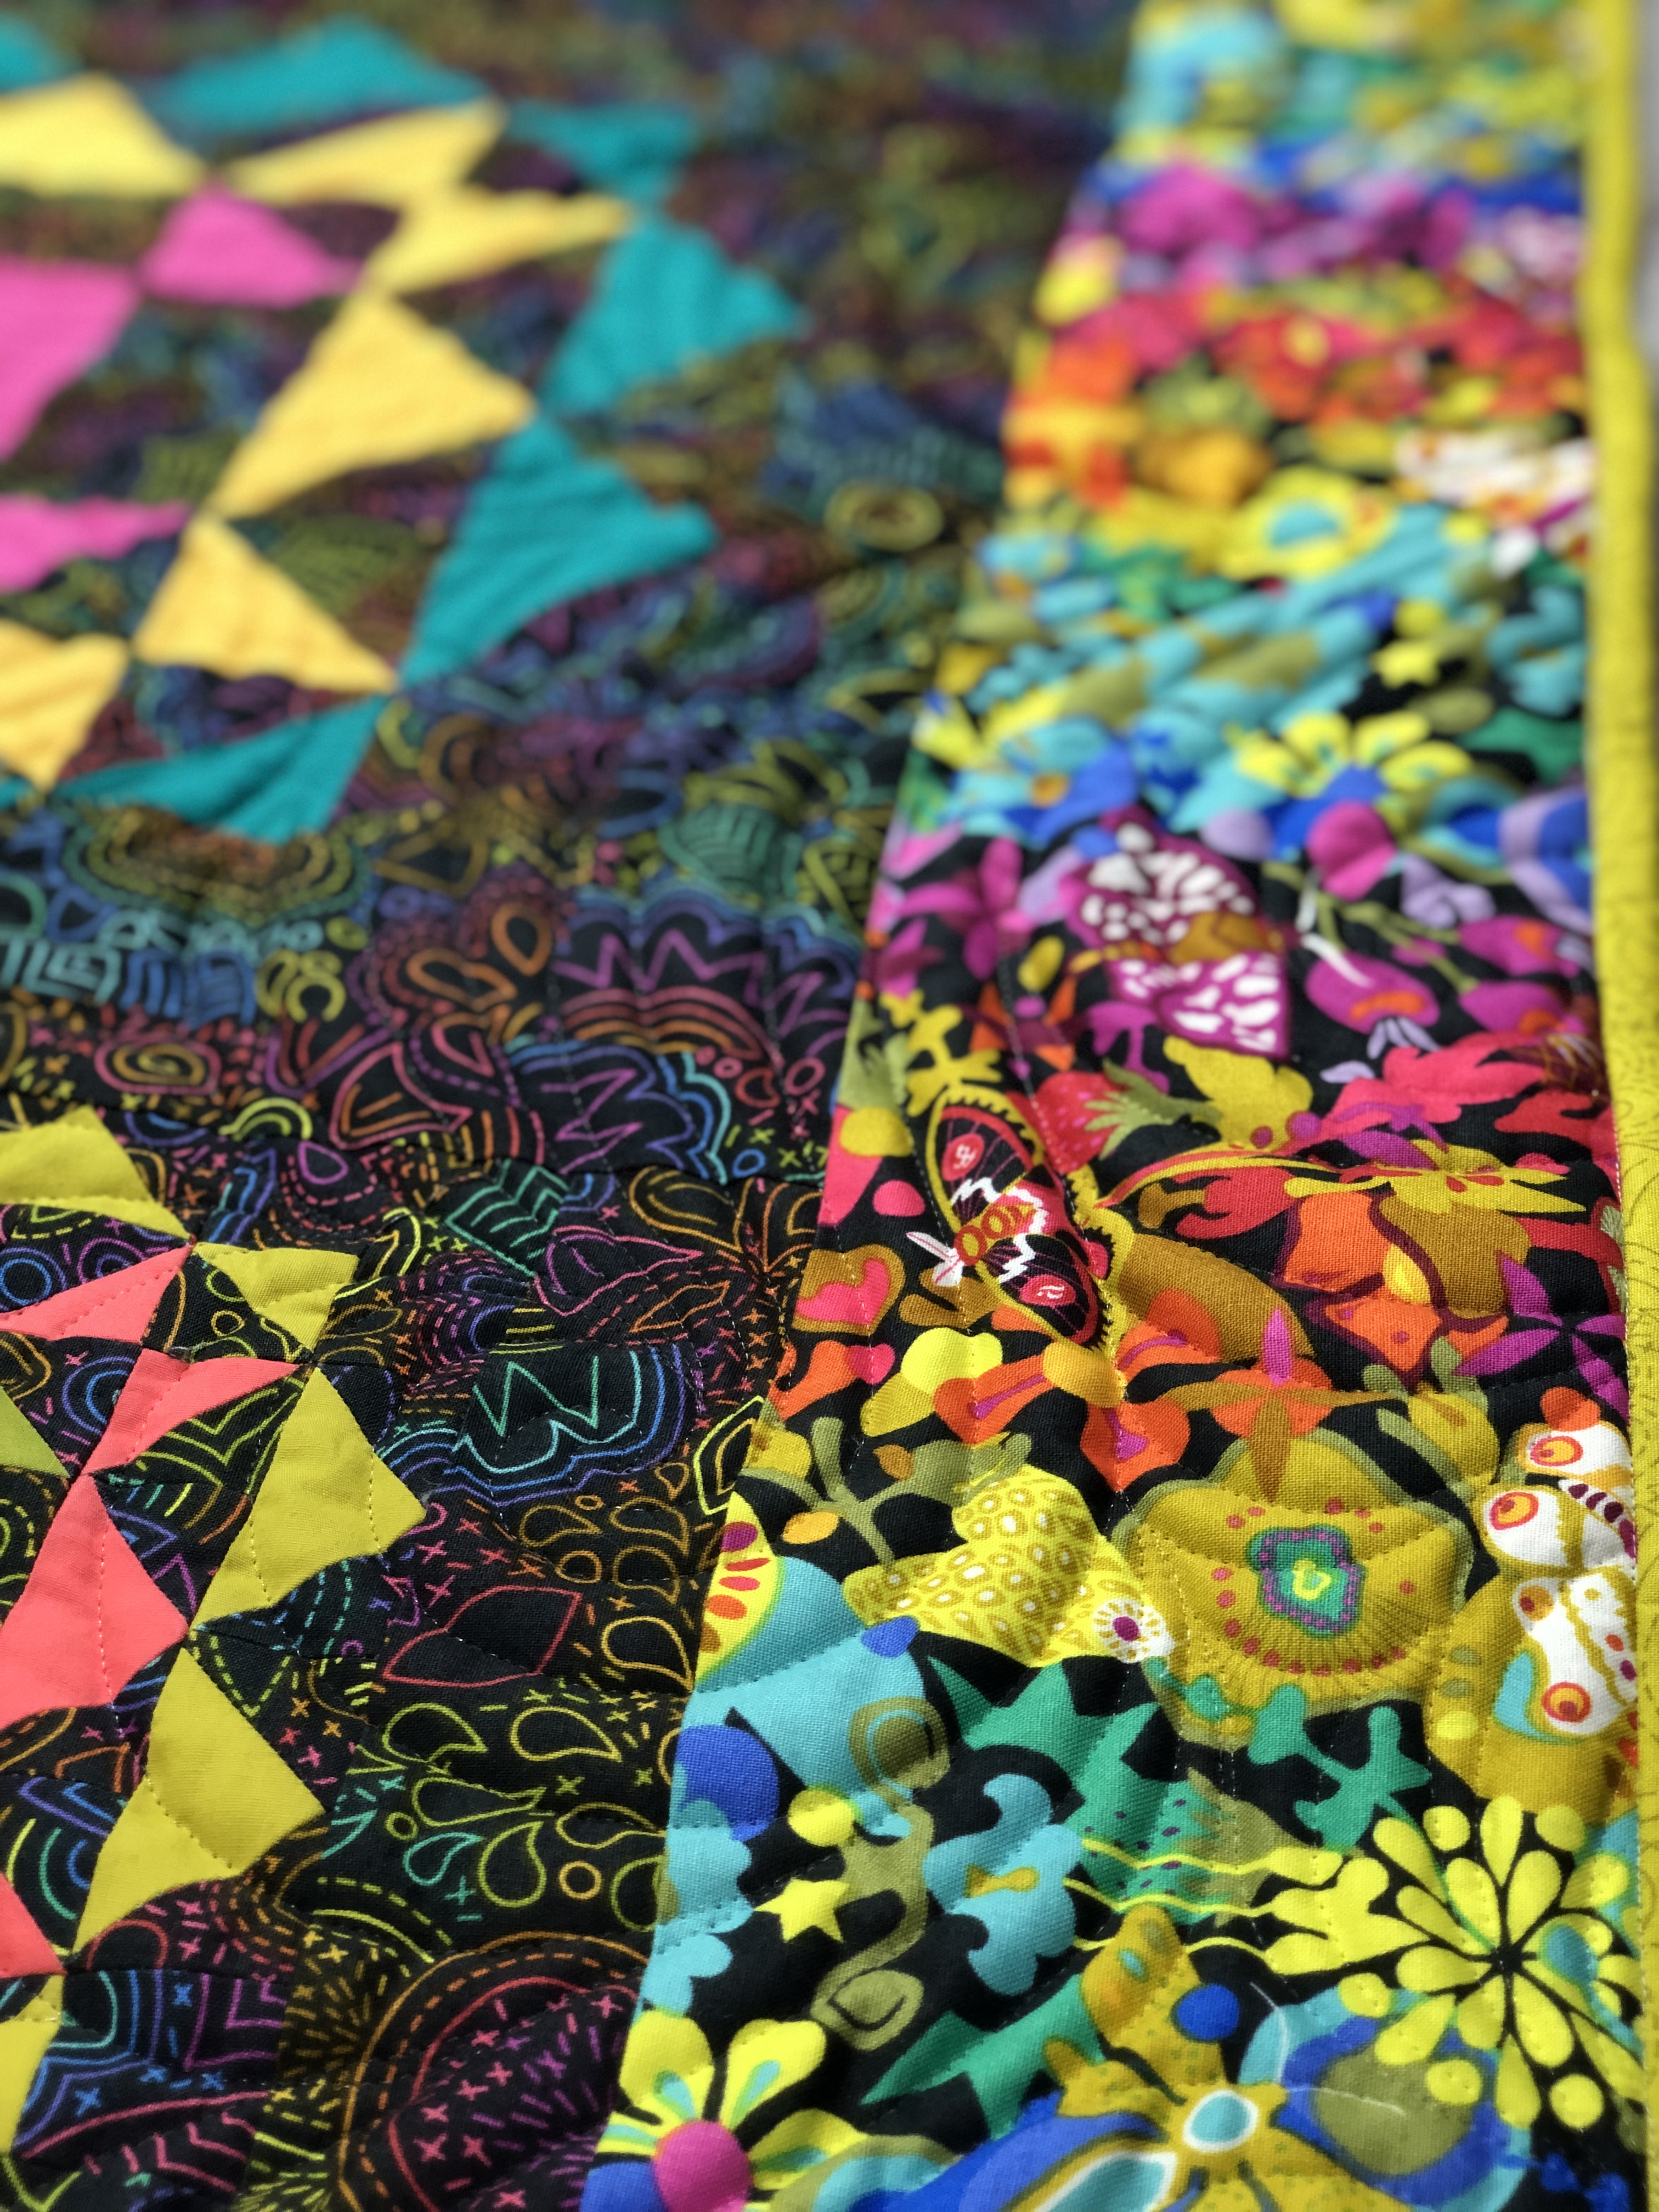
For the background, border and backing I used the dark colorway from her Art Theory collection and for the Kaleidoscope block points, I used solid fabrics from her Cross Stitch Coordinates collection.


There were more colors than needed for this project, so I selected based on complementary color values.
Planning & Cutting
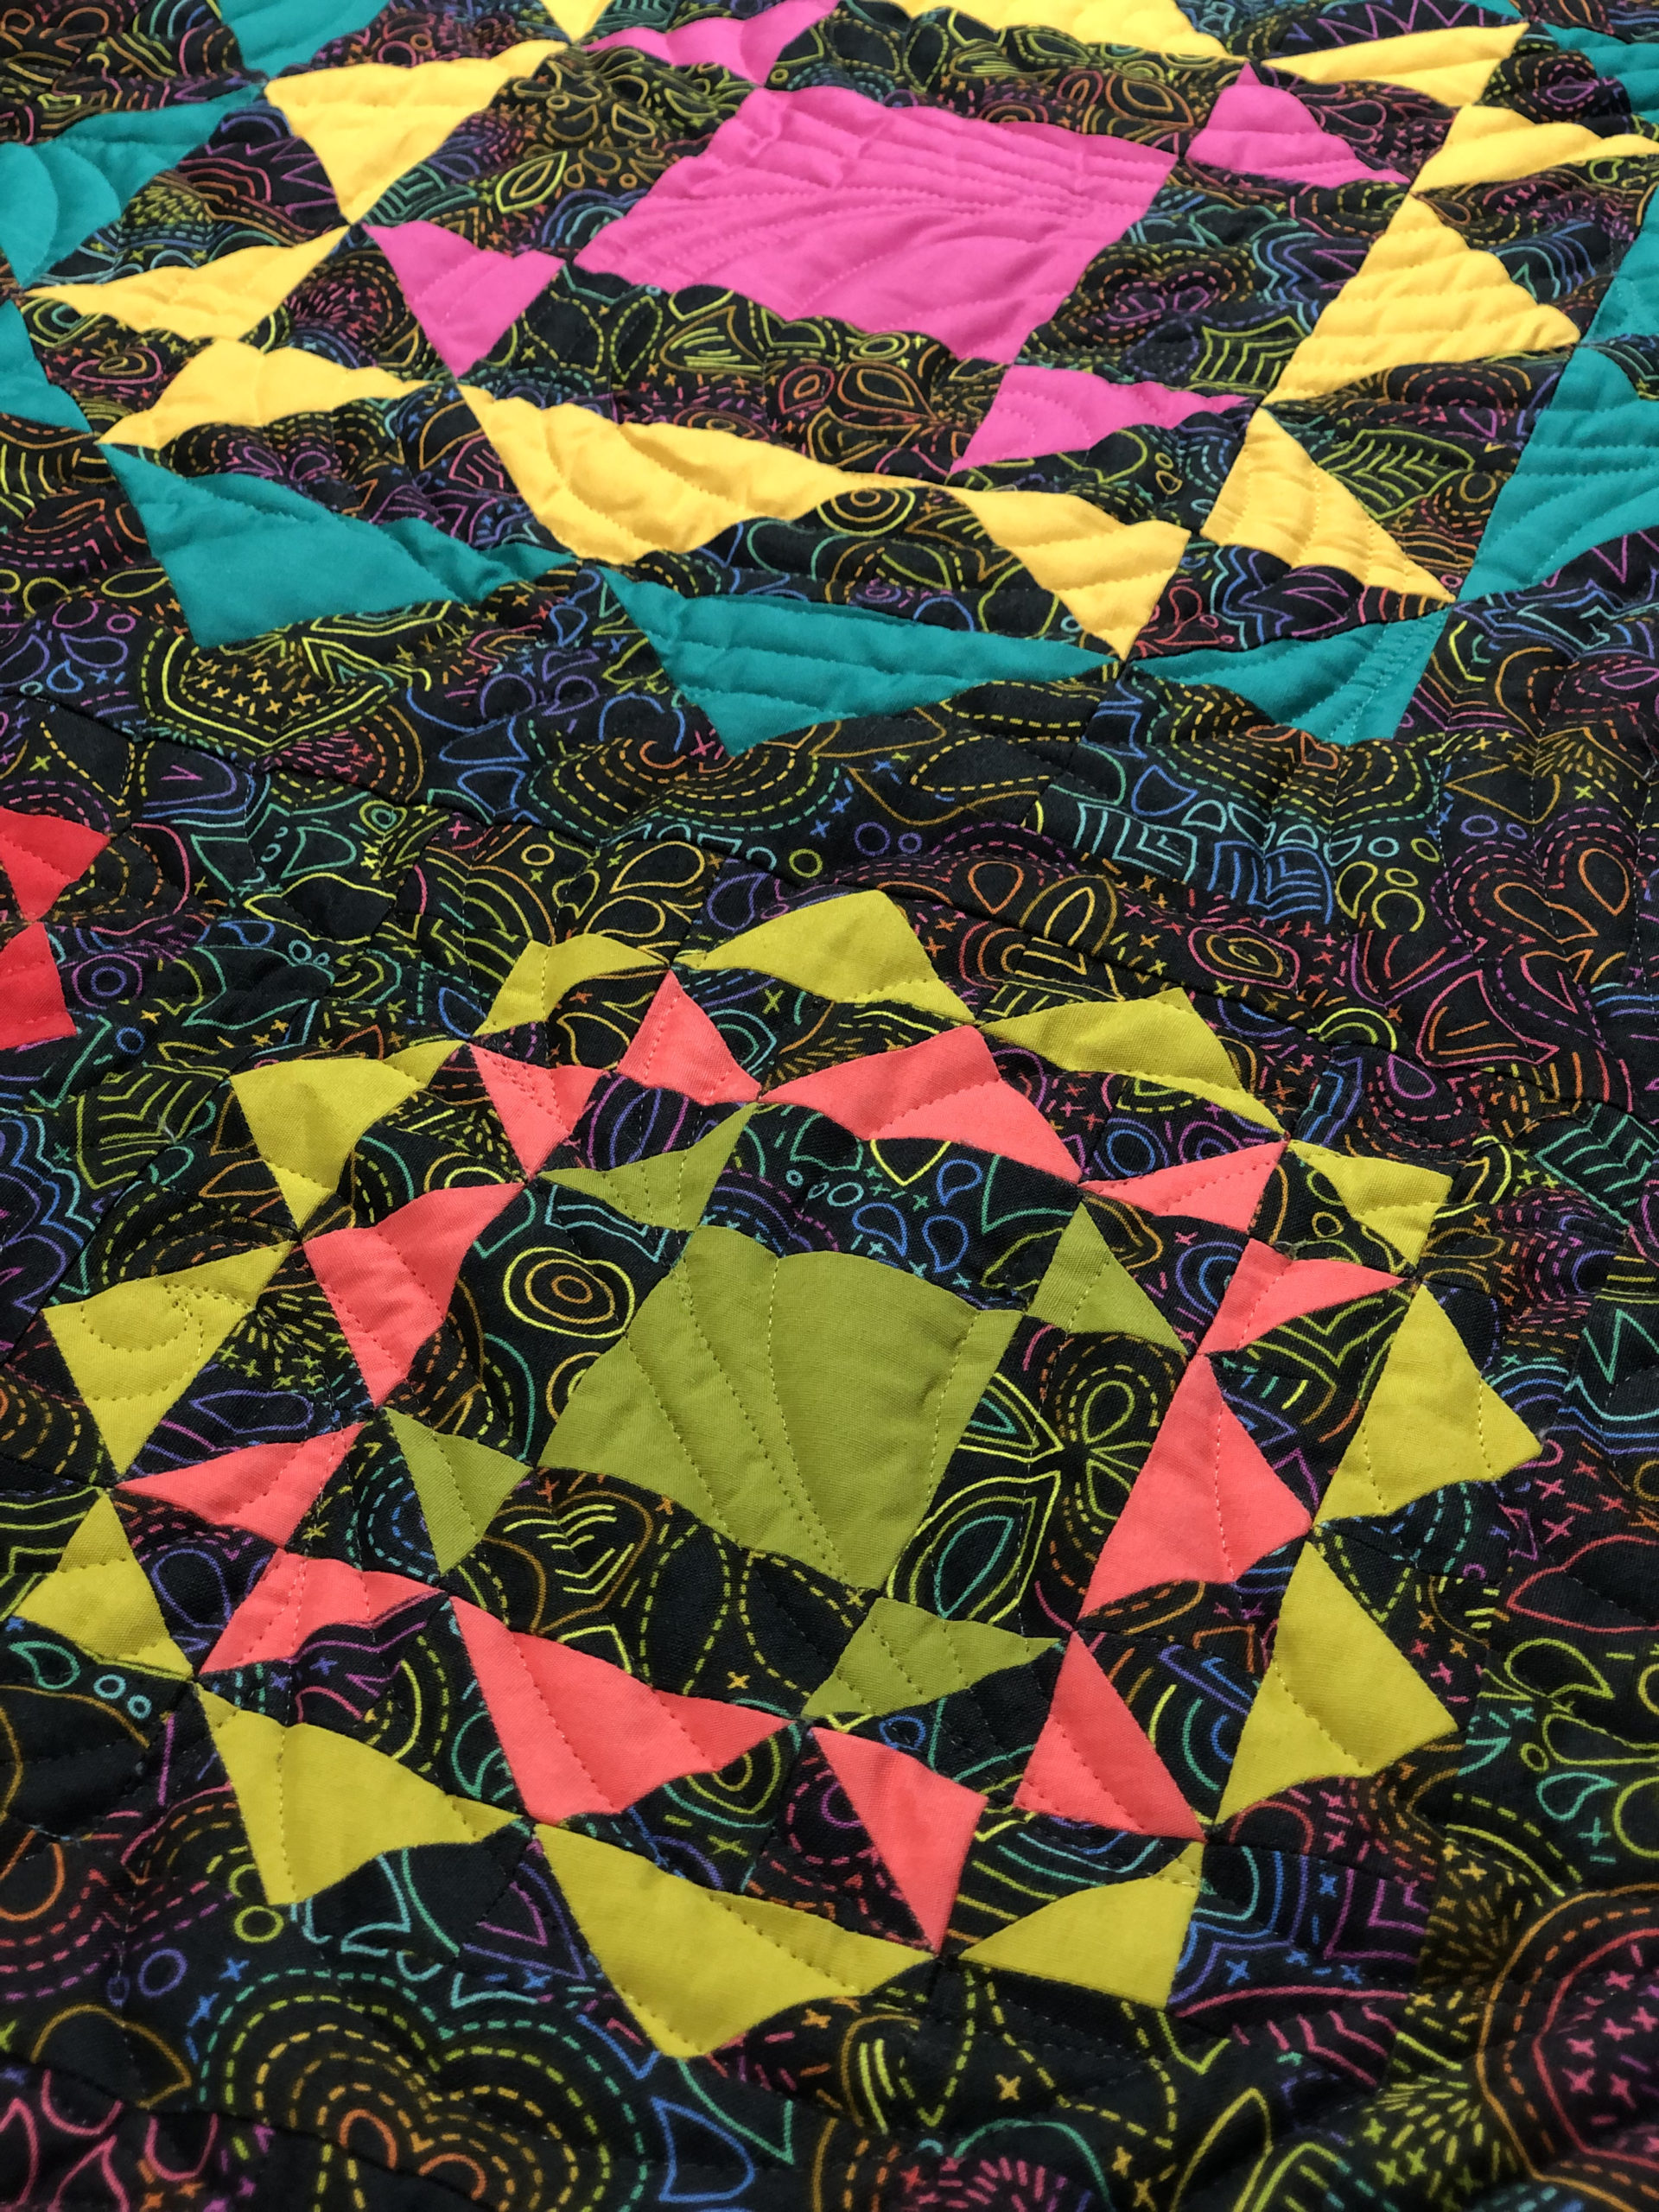
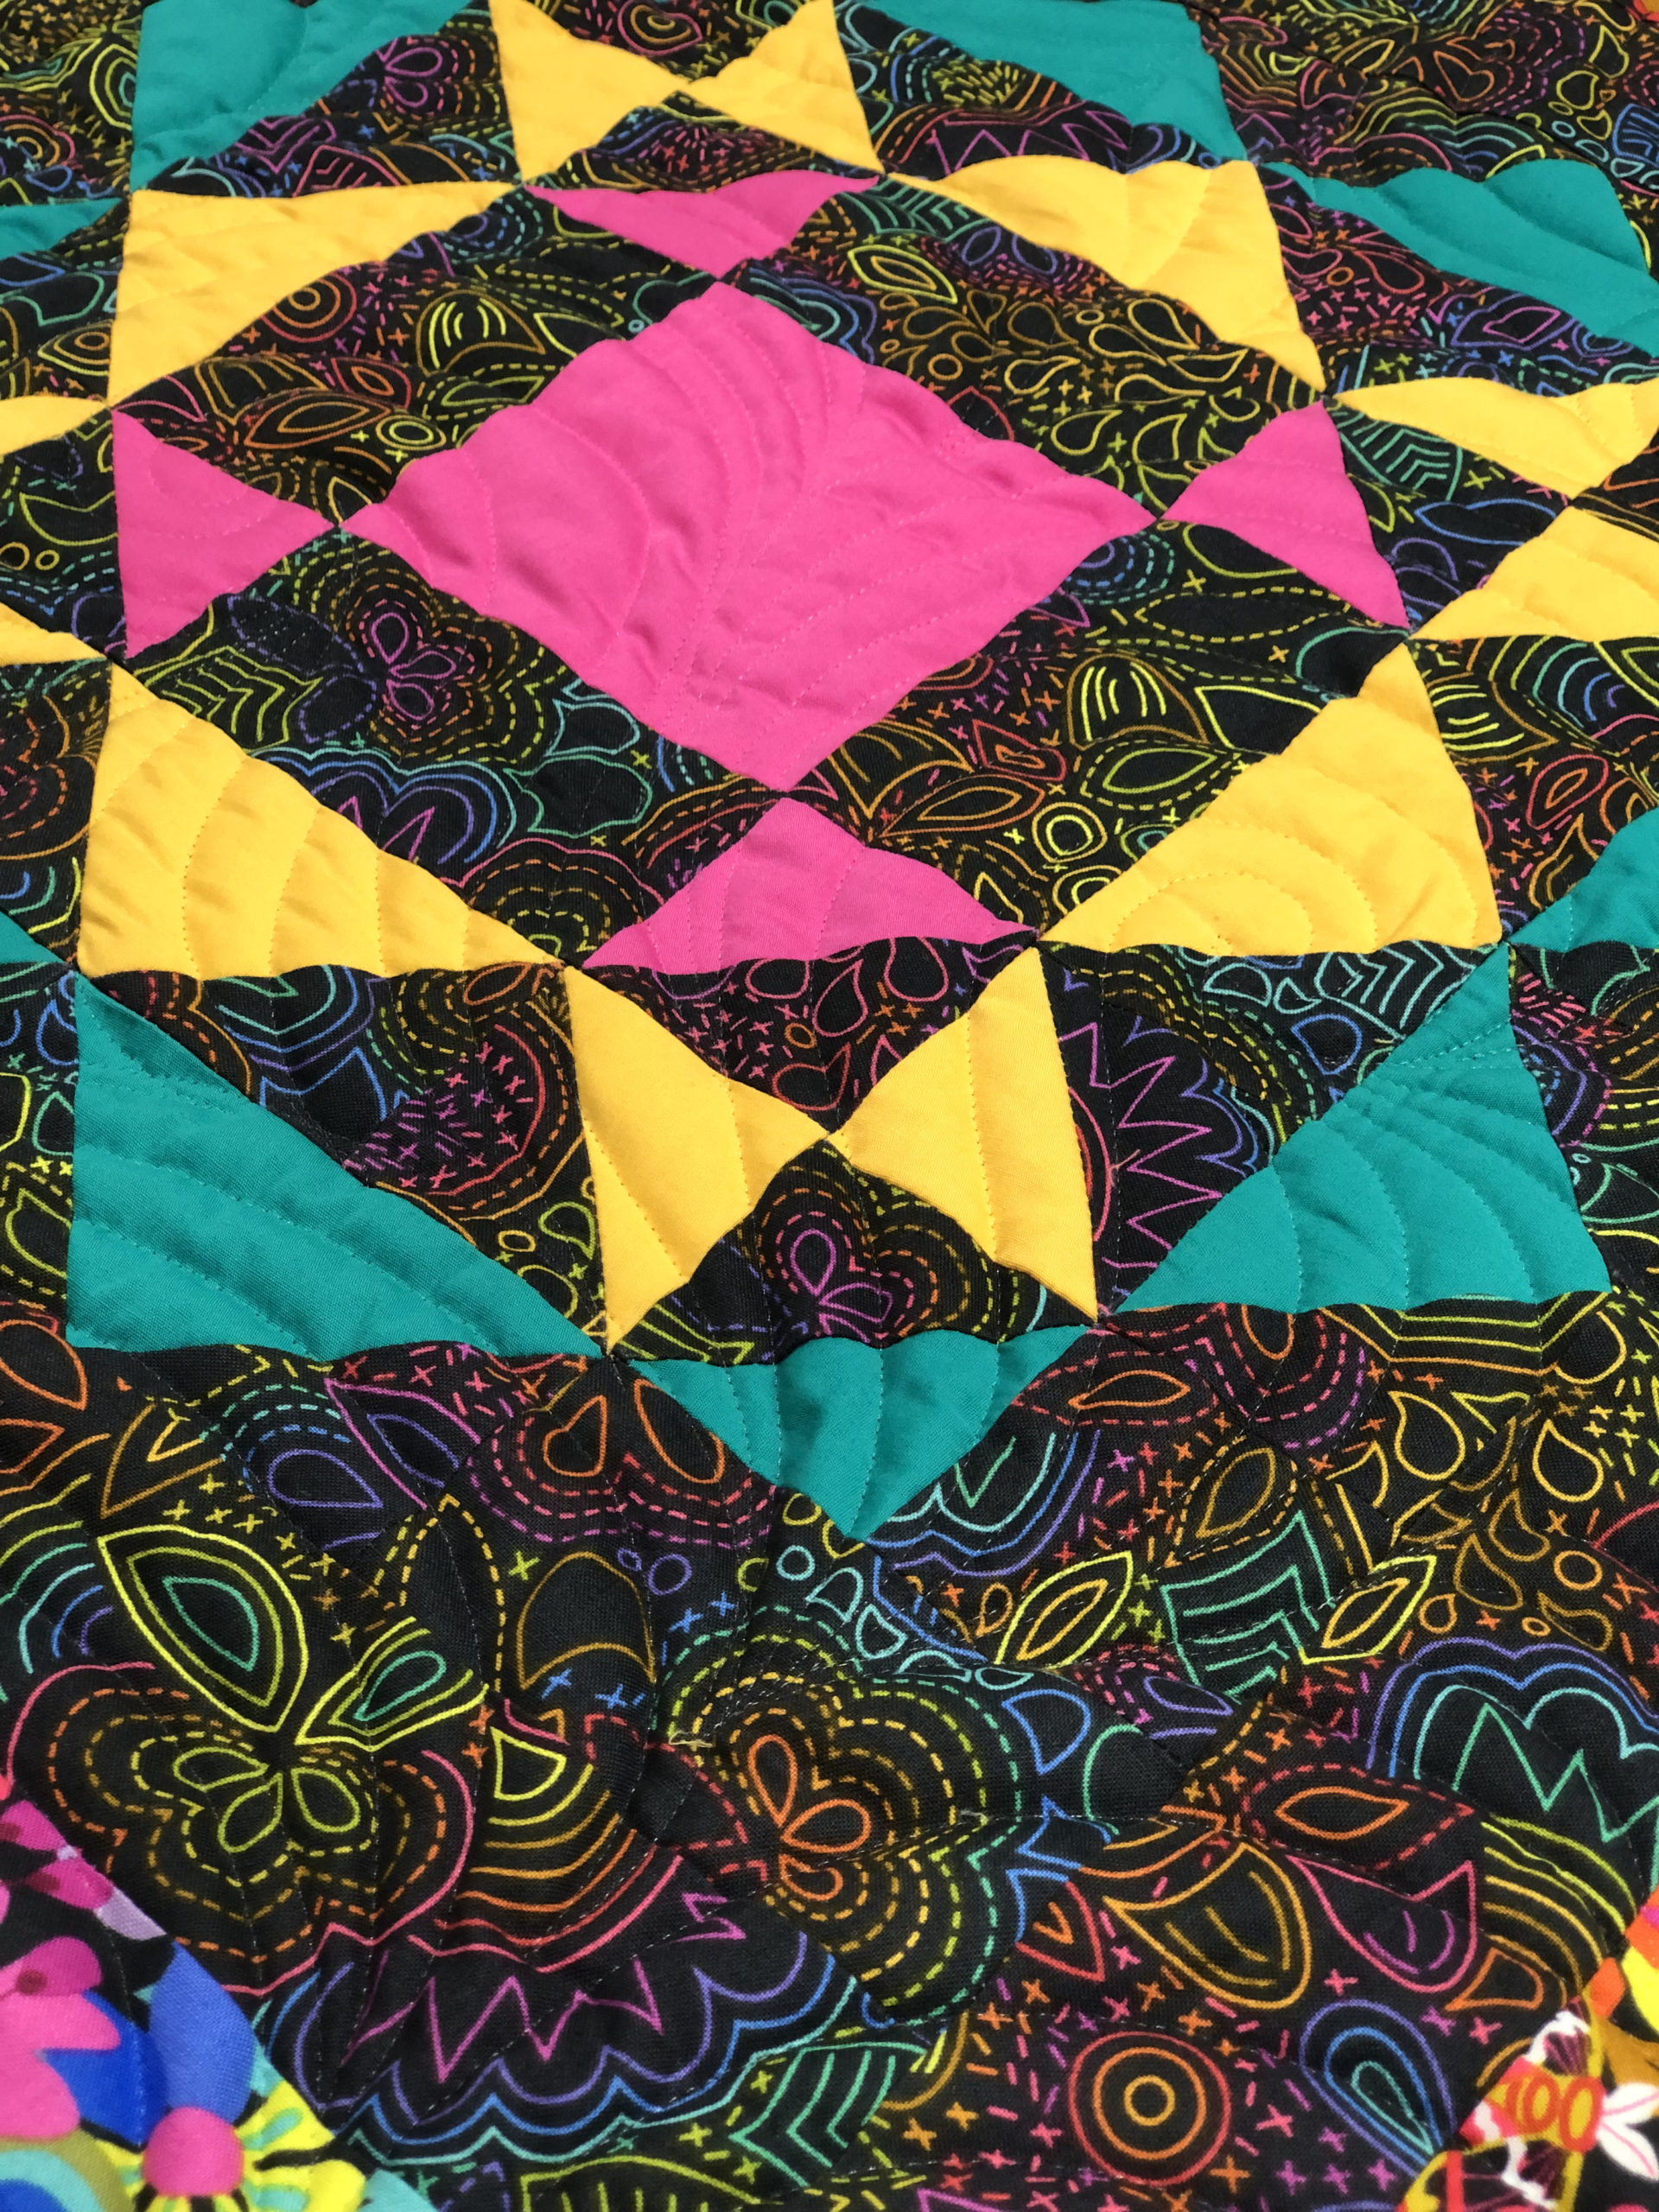
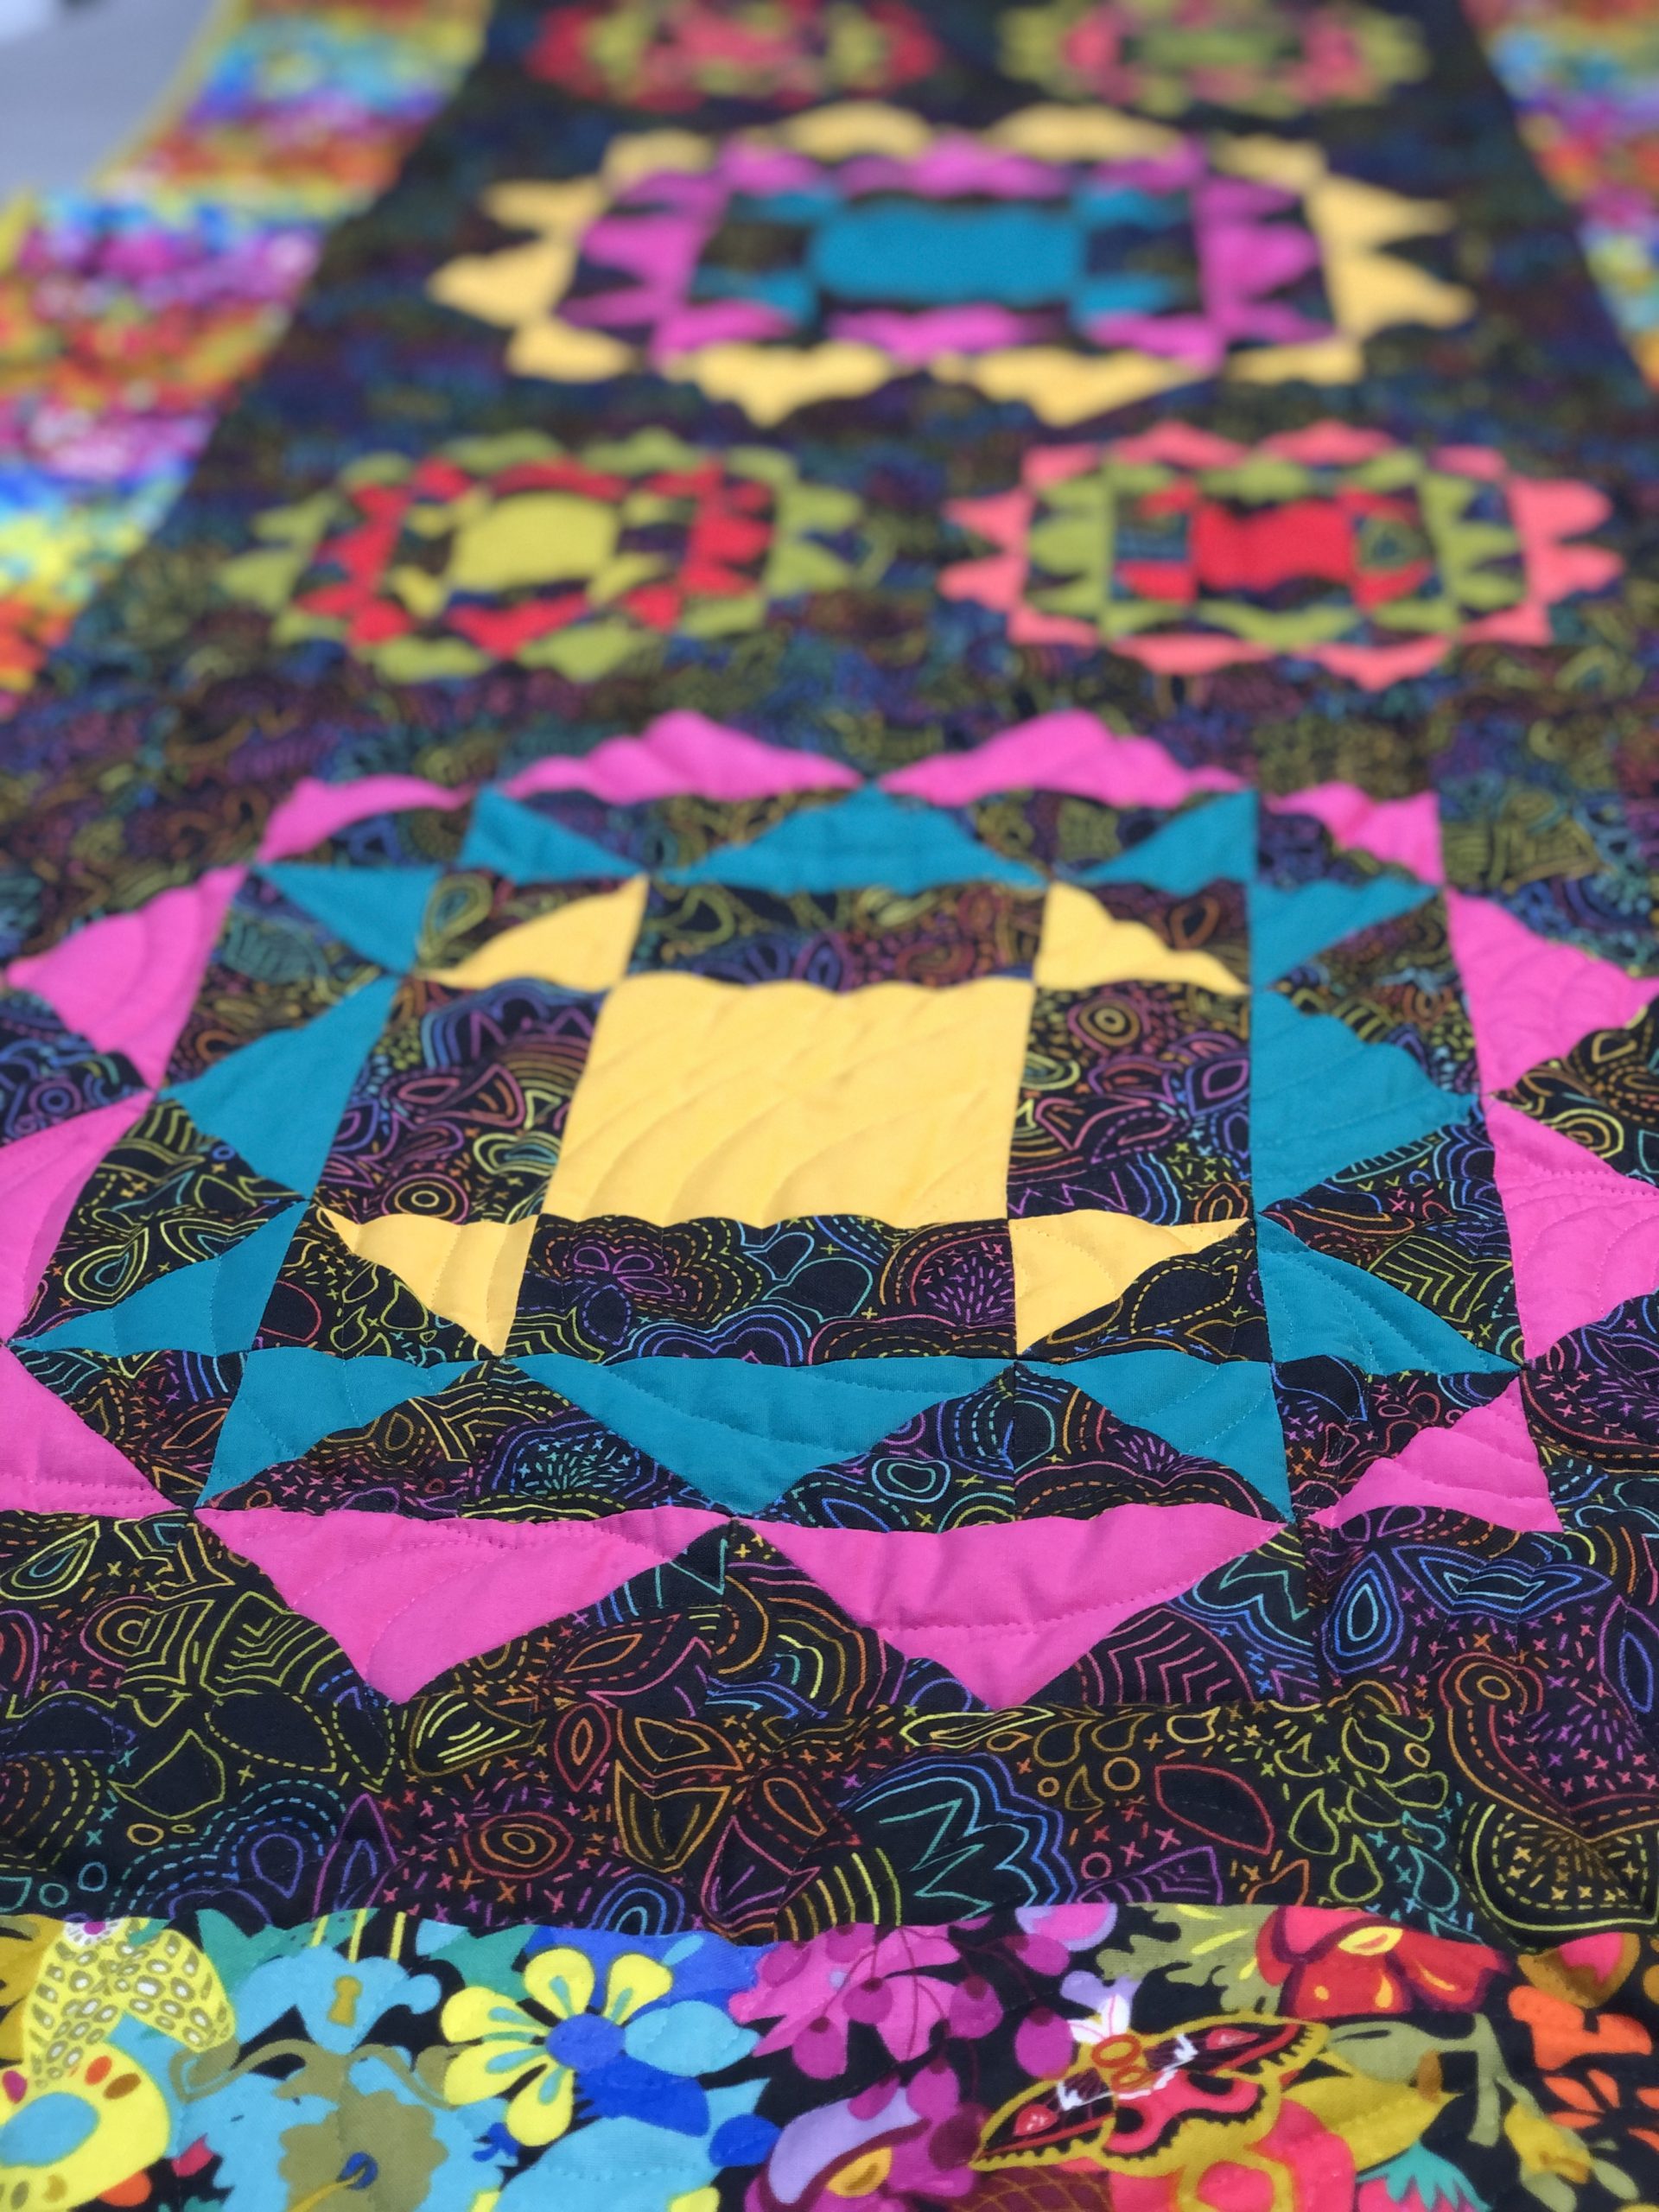
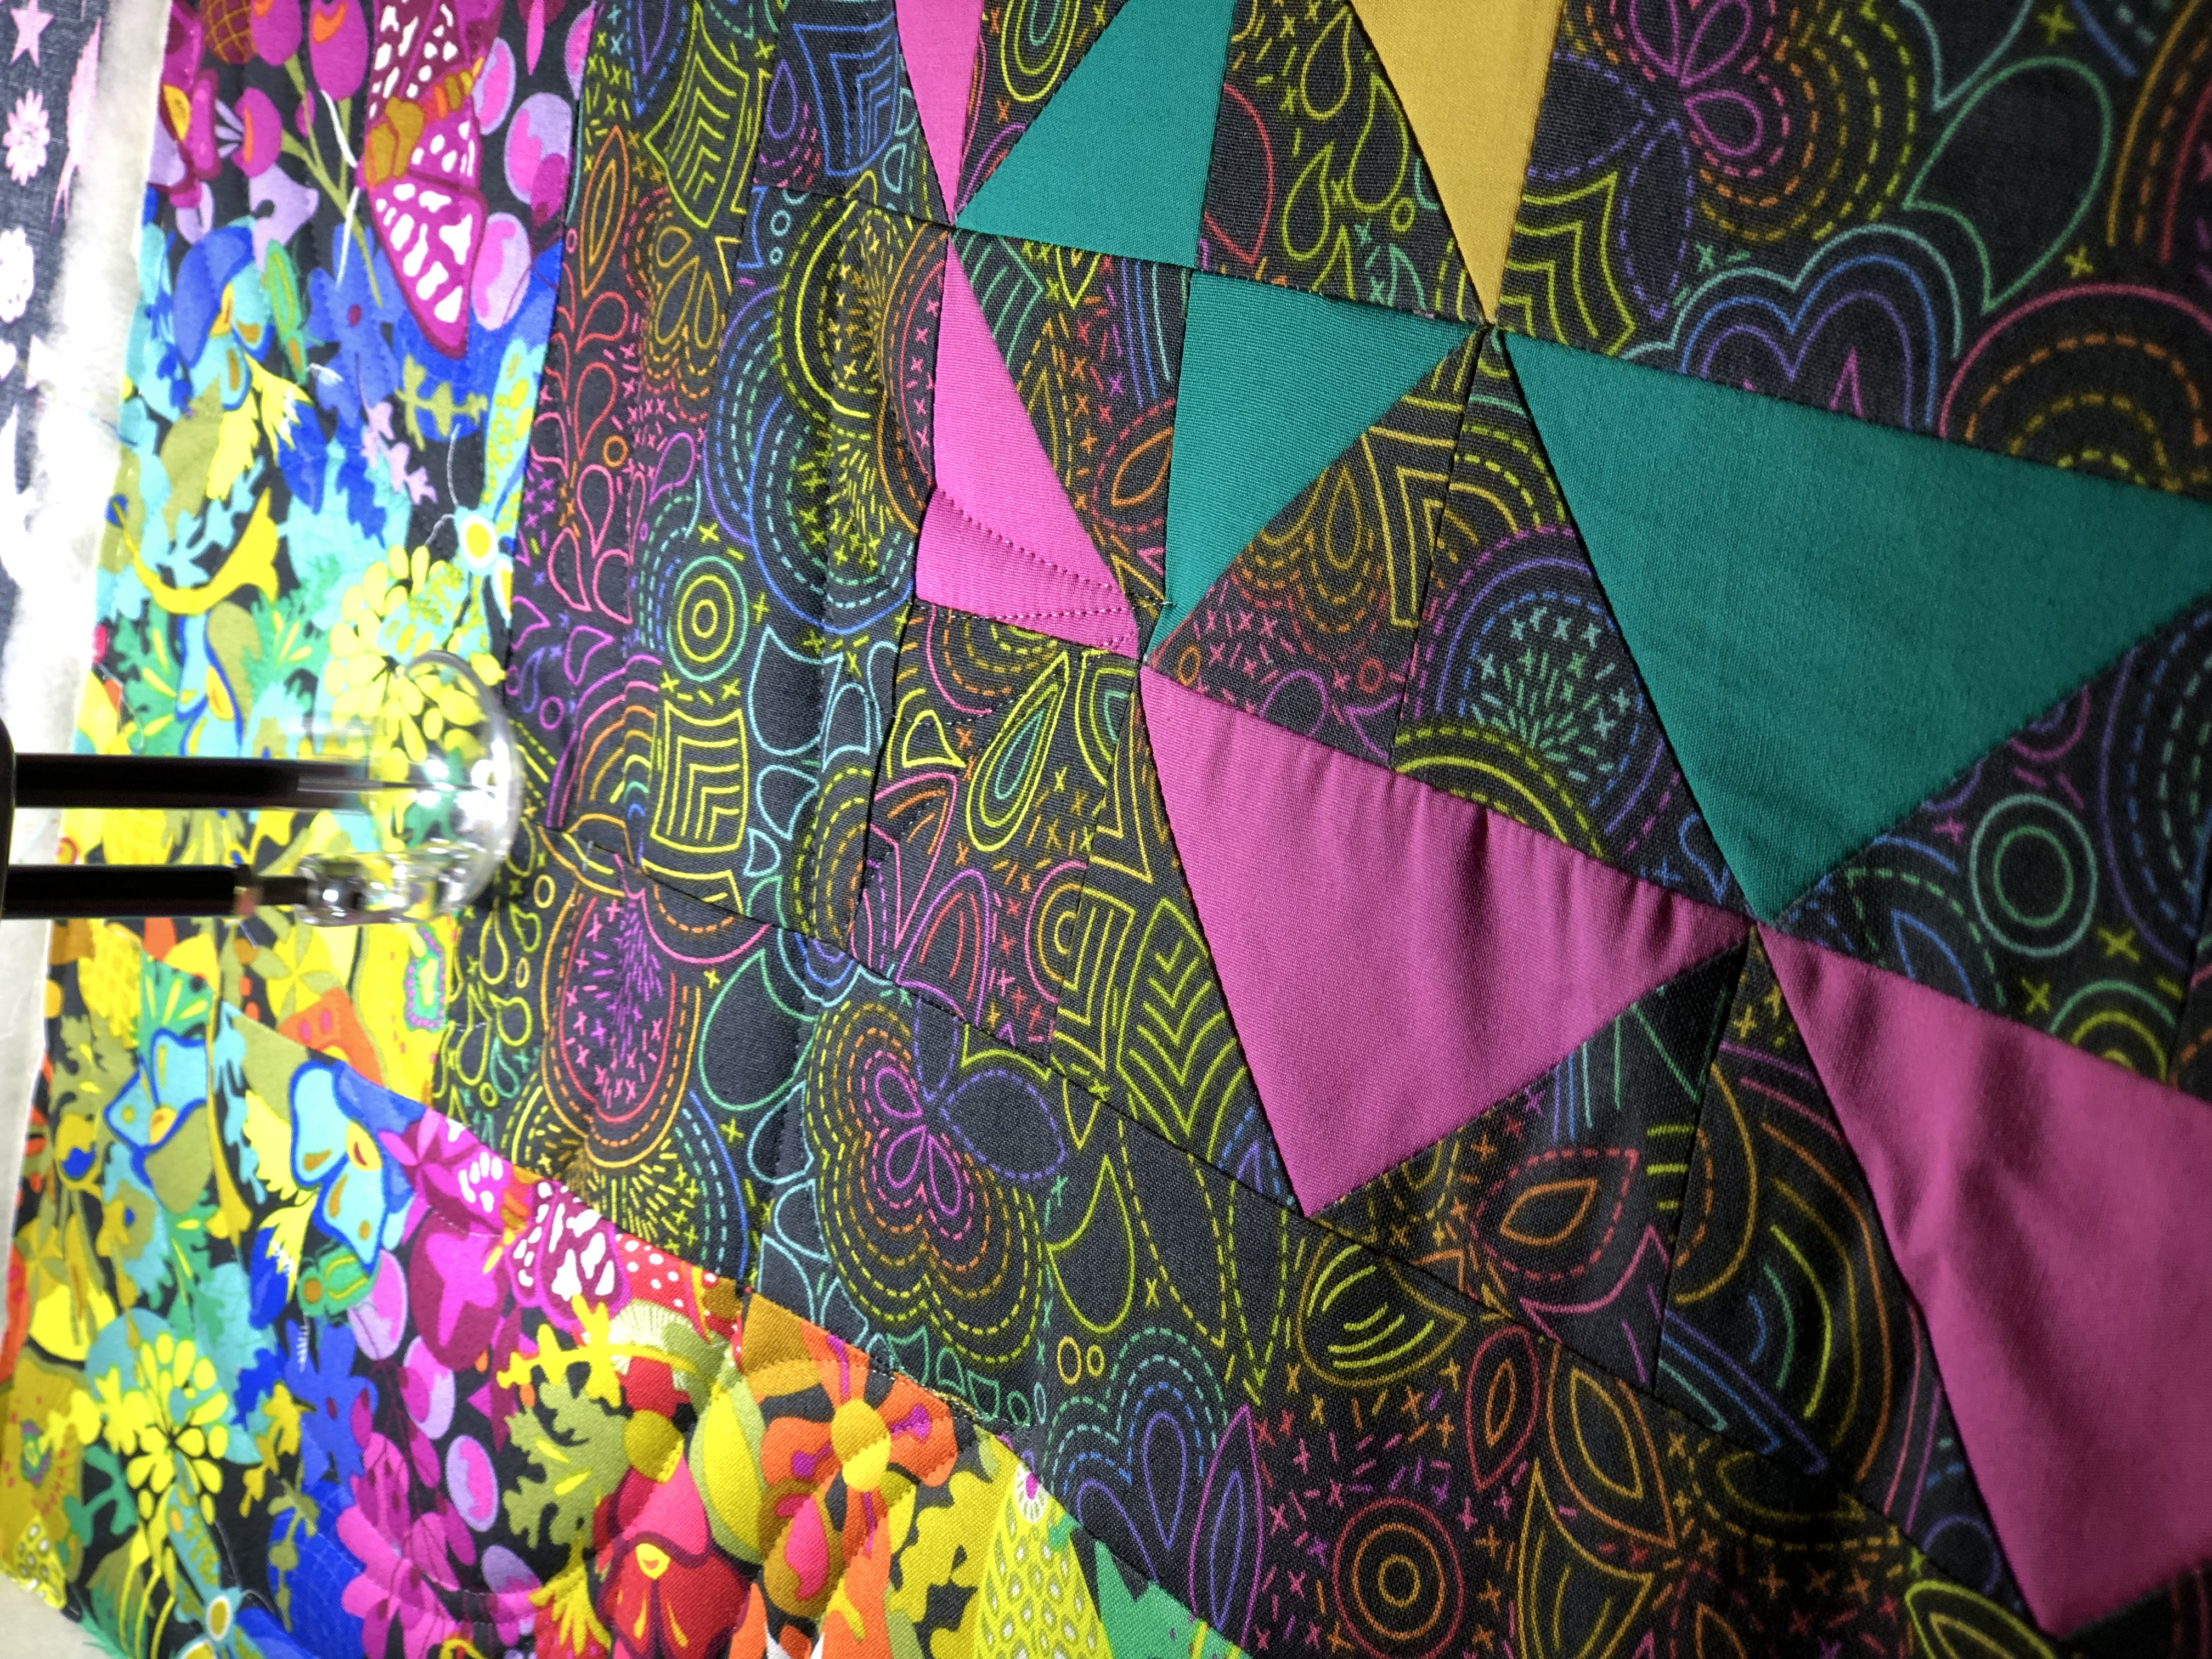
This pattern is primarily composed of half-square triangles and flying geese, so accurate cutting and sewing is essential. Although there were instructions for cutting HST’s and flying geese using triangles on a roll triangle paper and flying geese foundation paper, I was of course determined to translate the instructions into Accuquilt die sizes.
I found that the new 4-inch Qube, the 9-inch Qube and the 4-inch finished Quarter Square triangle die were what was needed.
Using the Accuquilt die system, flying geese can be made using a half-square triangle die along with a quarter square triangle which matches the height of the HST.
For the queen-size blocks in this pattern, I was able to use the 2 1/2″ HST die in the 9-inch cube and the 4 1/2″ quarter square triangle die to create the 2 1/2″ x 4 1/2″ flying geese (finished size 2″ x 4″).


Piecing
With so many HSTs and QSTs the sew, chain piecing was my best friend, for this project. With the HST’s it was just a matter of matching up the fabrics in the die cutter so that they were right sides together, then just picking them up and sewing one after the other. For the QST’s I did the same, except I did one background side first, then the other.


I also made good use of both a wool pressing mat and a quilter’s clapper.
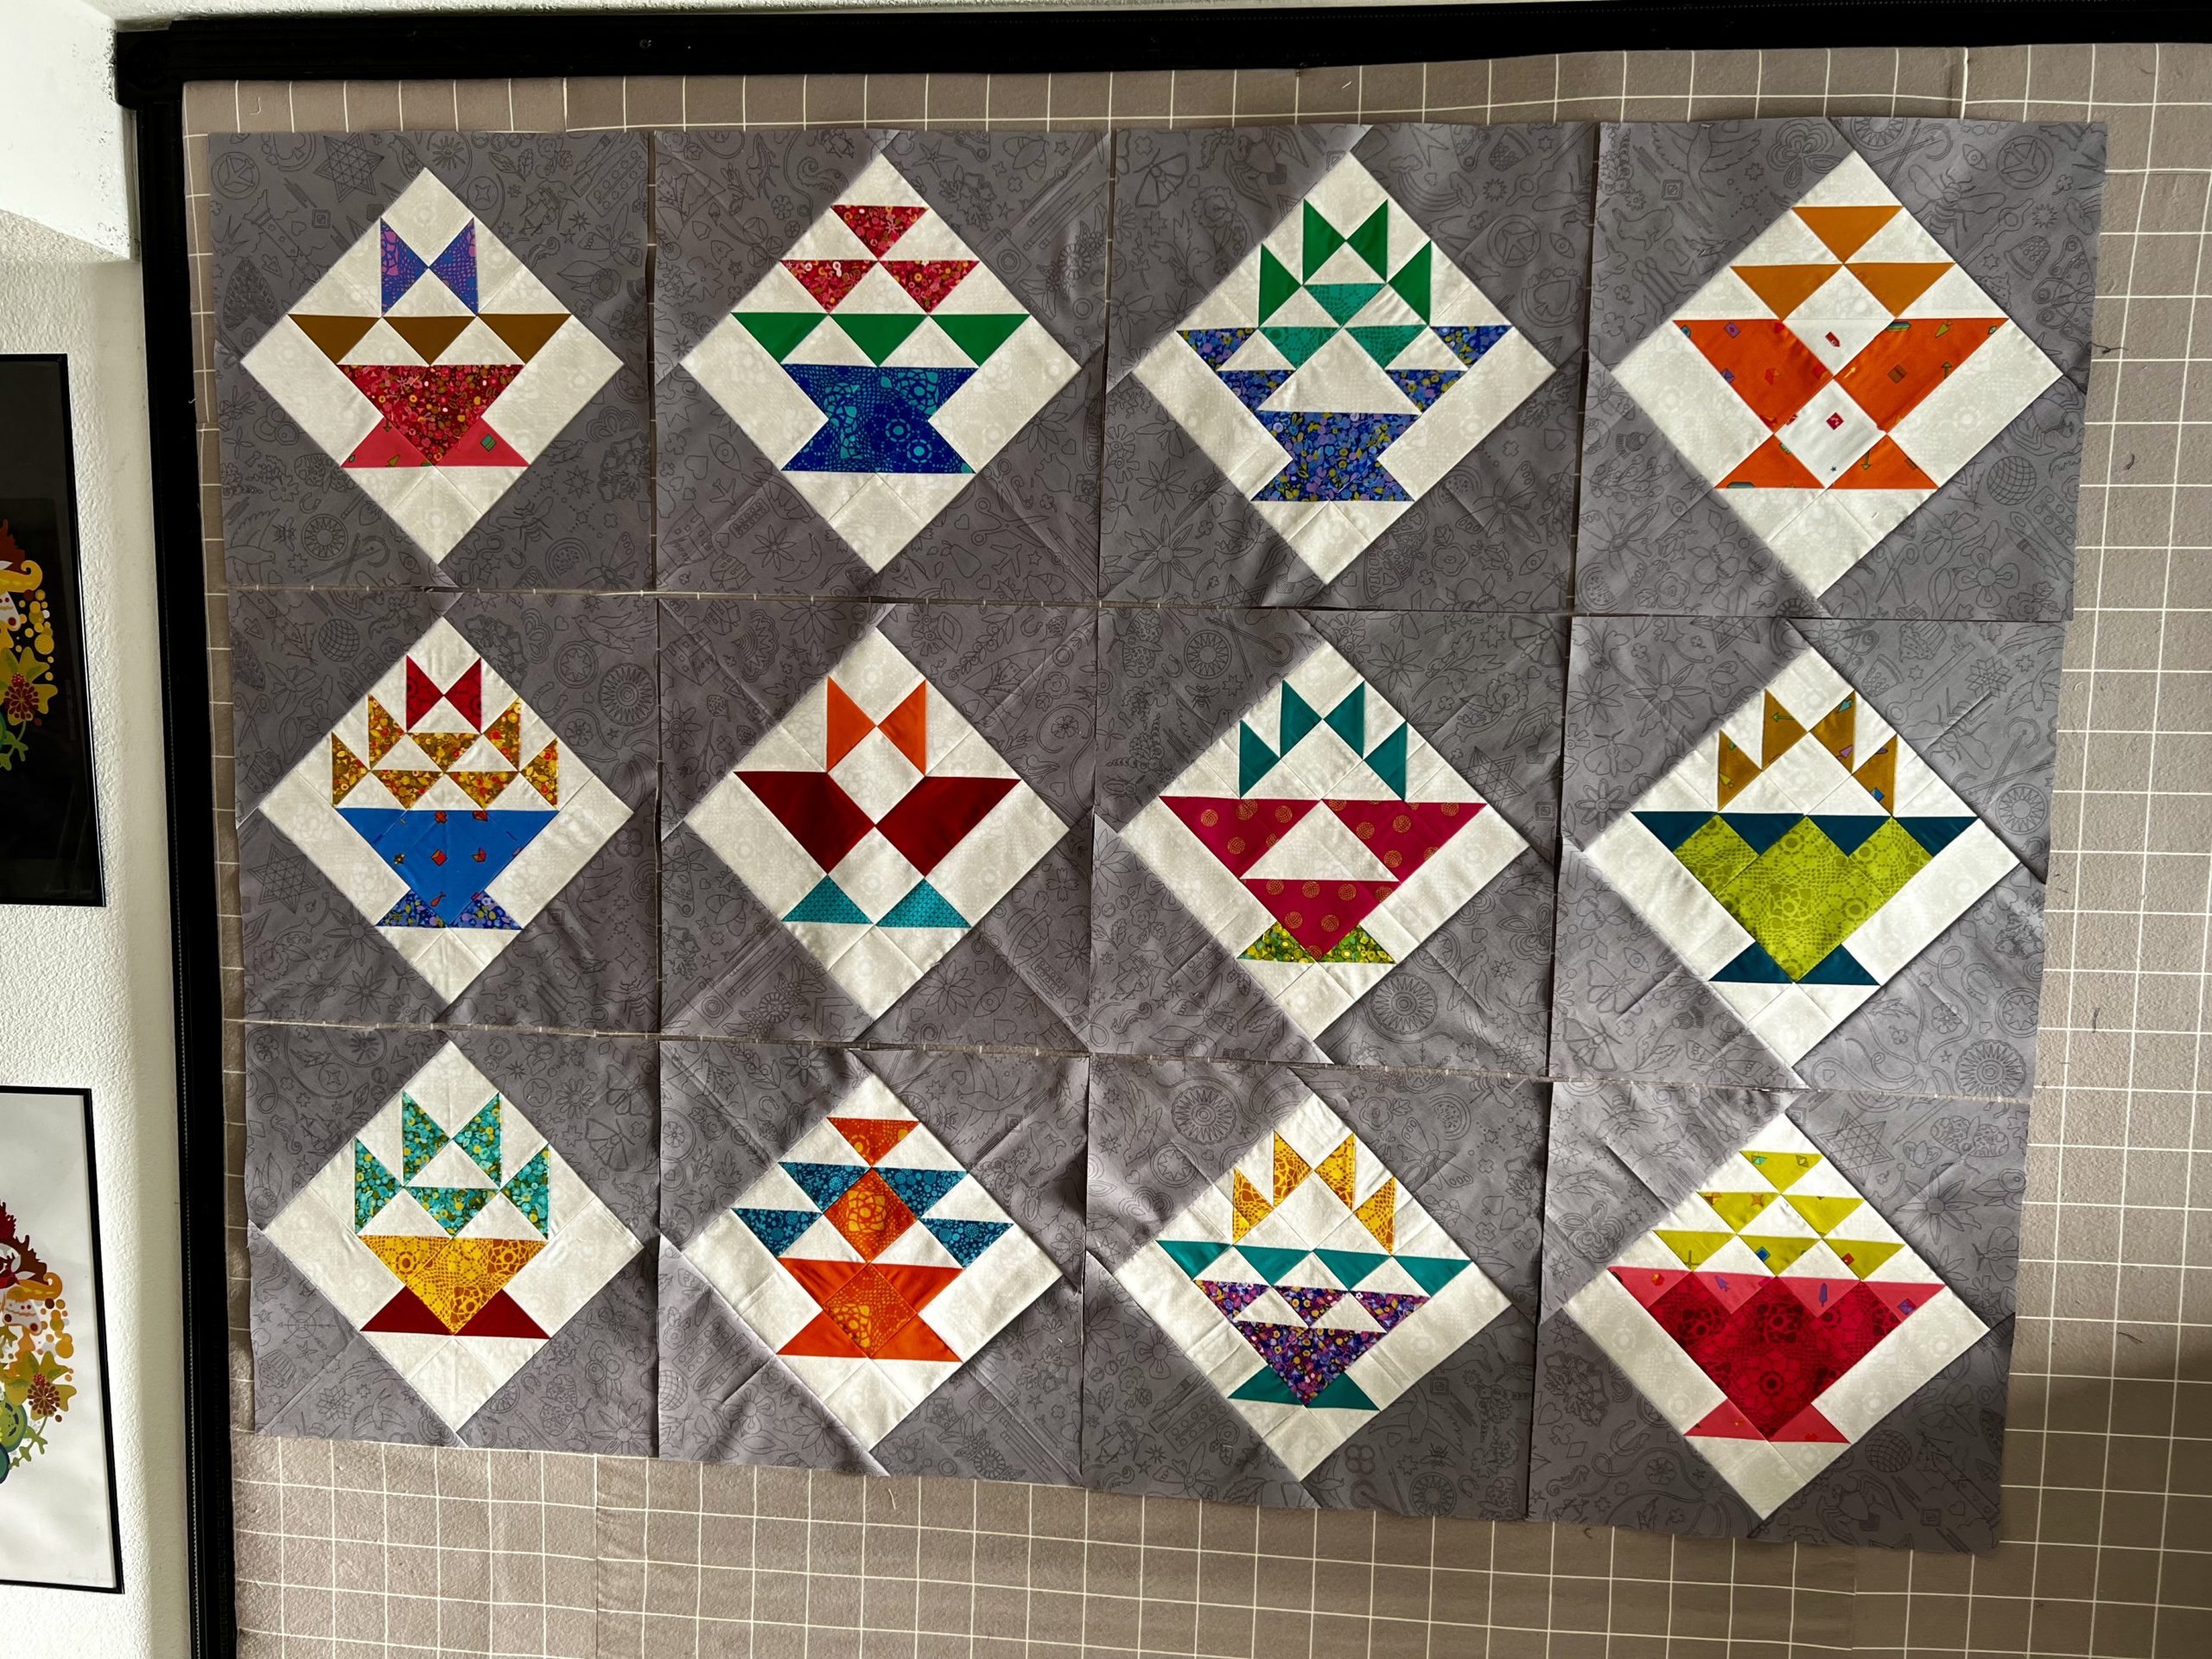
After assembling the individual pieces, I began assembling the sections. First the 3 queen sized blocks, then later, the smaller, more challenging crib sized blocks.


Assemble and Finish Top
After a bit of careful piecing to match points, all three queen size blocks as well as all four crib size blocks were complete. The last few steps were to add the sashing around the blocks for the background, then to add the borders and get ready to quilt!


Quilt, Bind, Label, Complete!
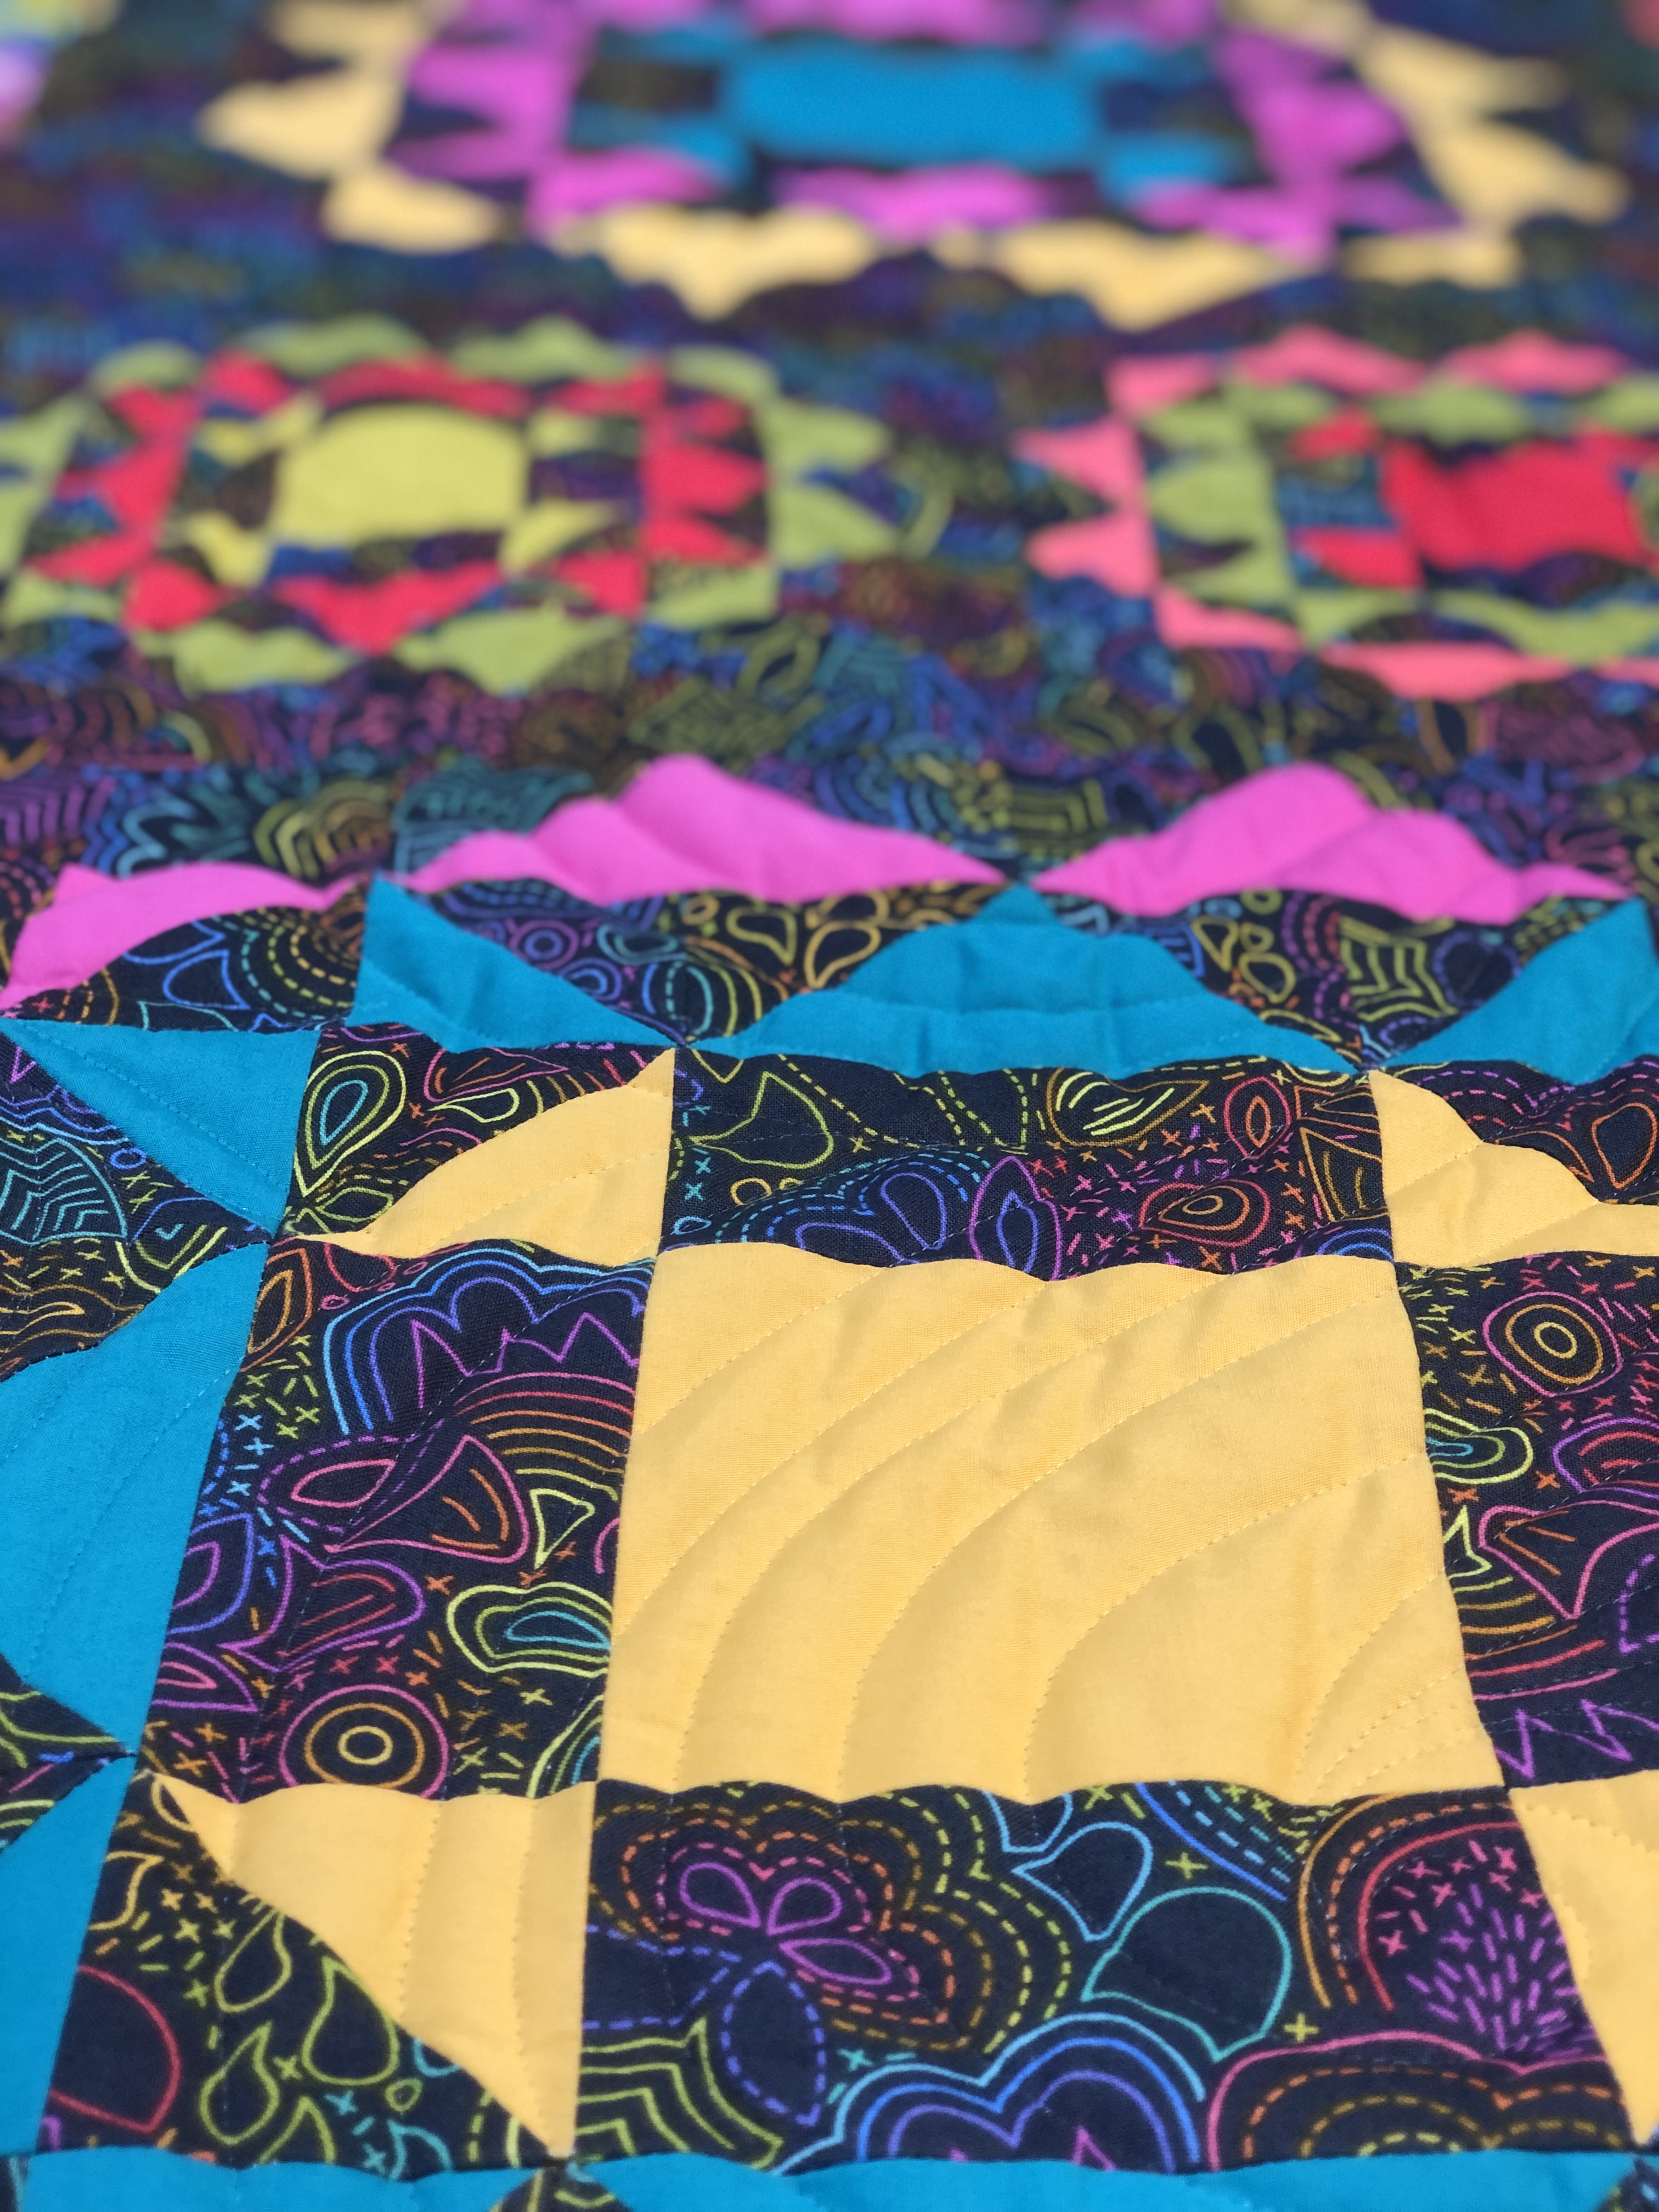
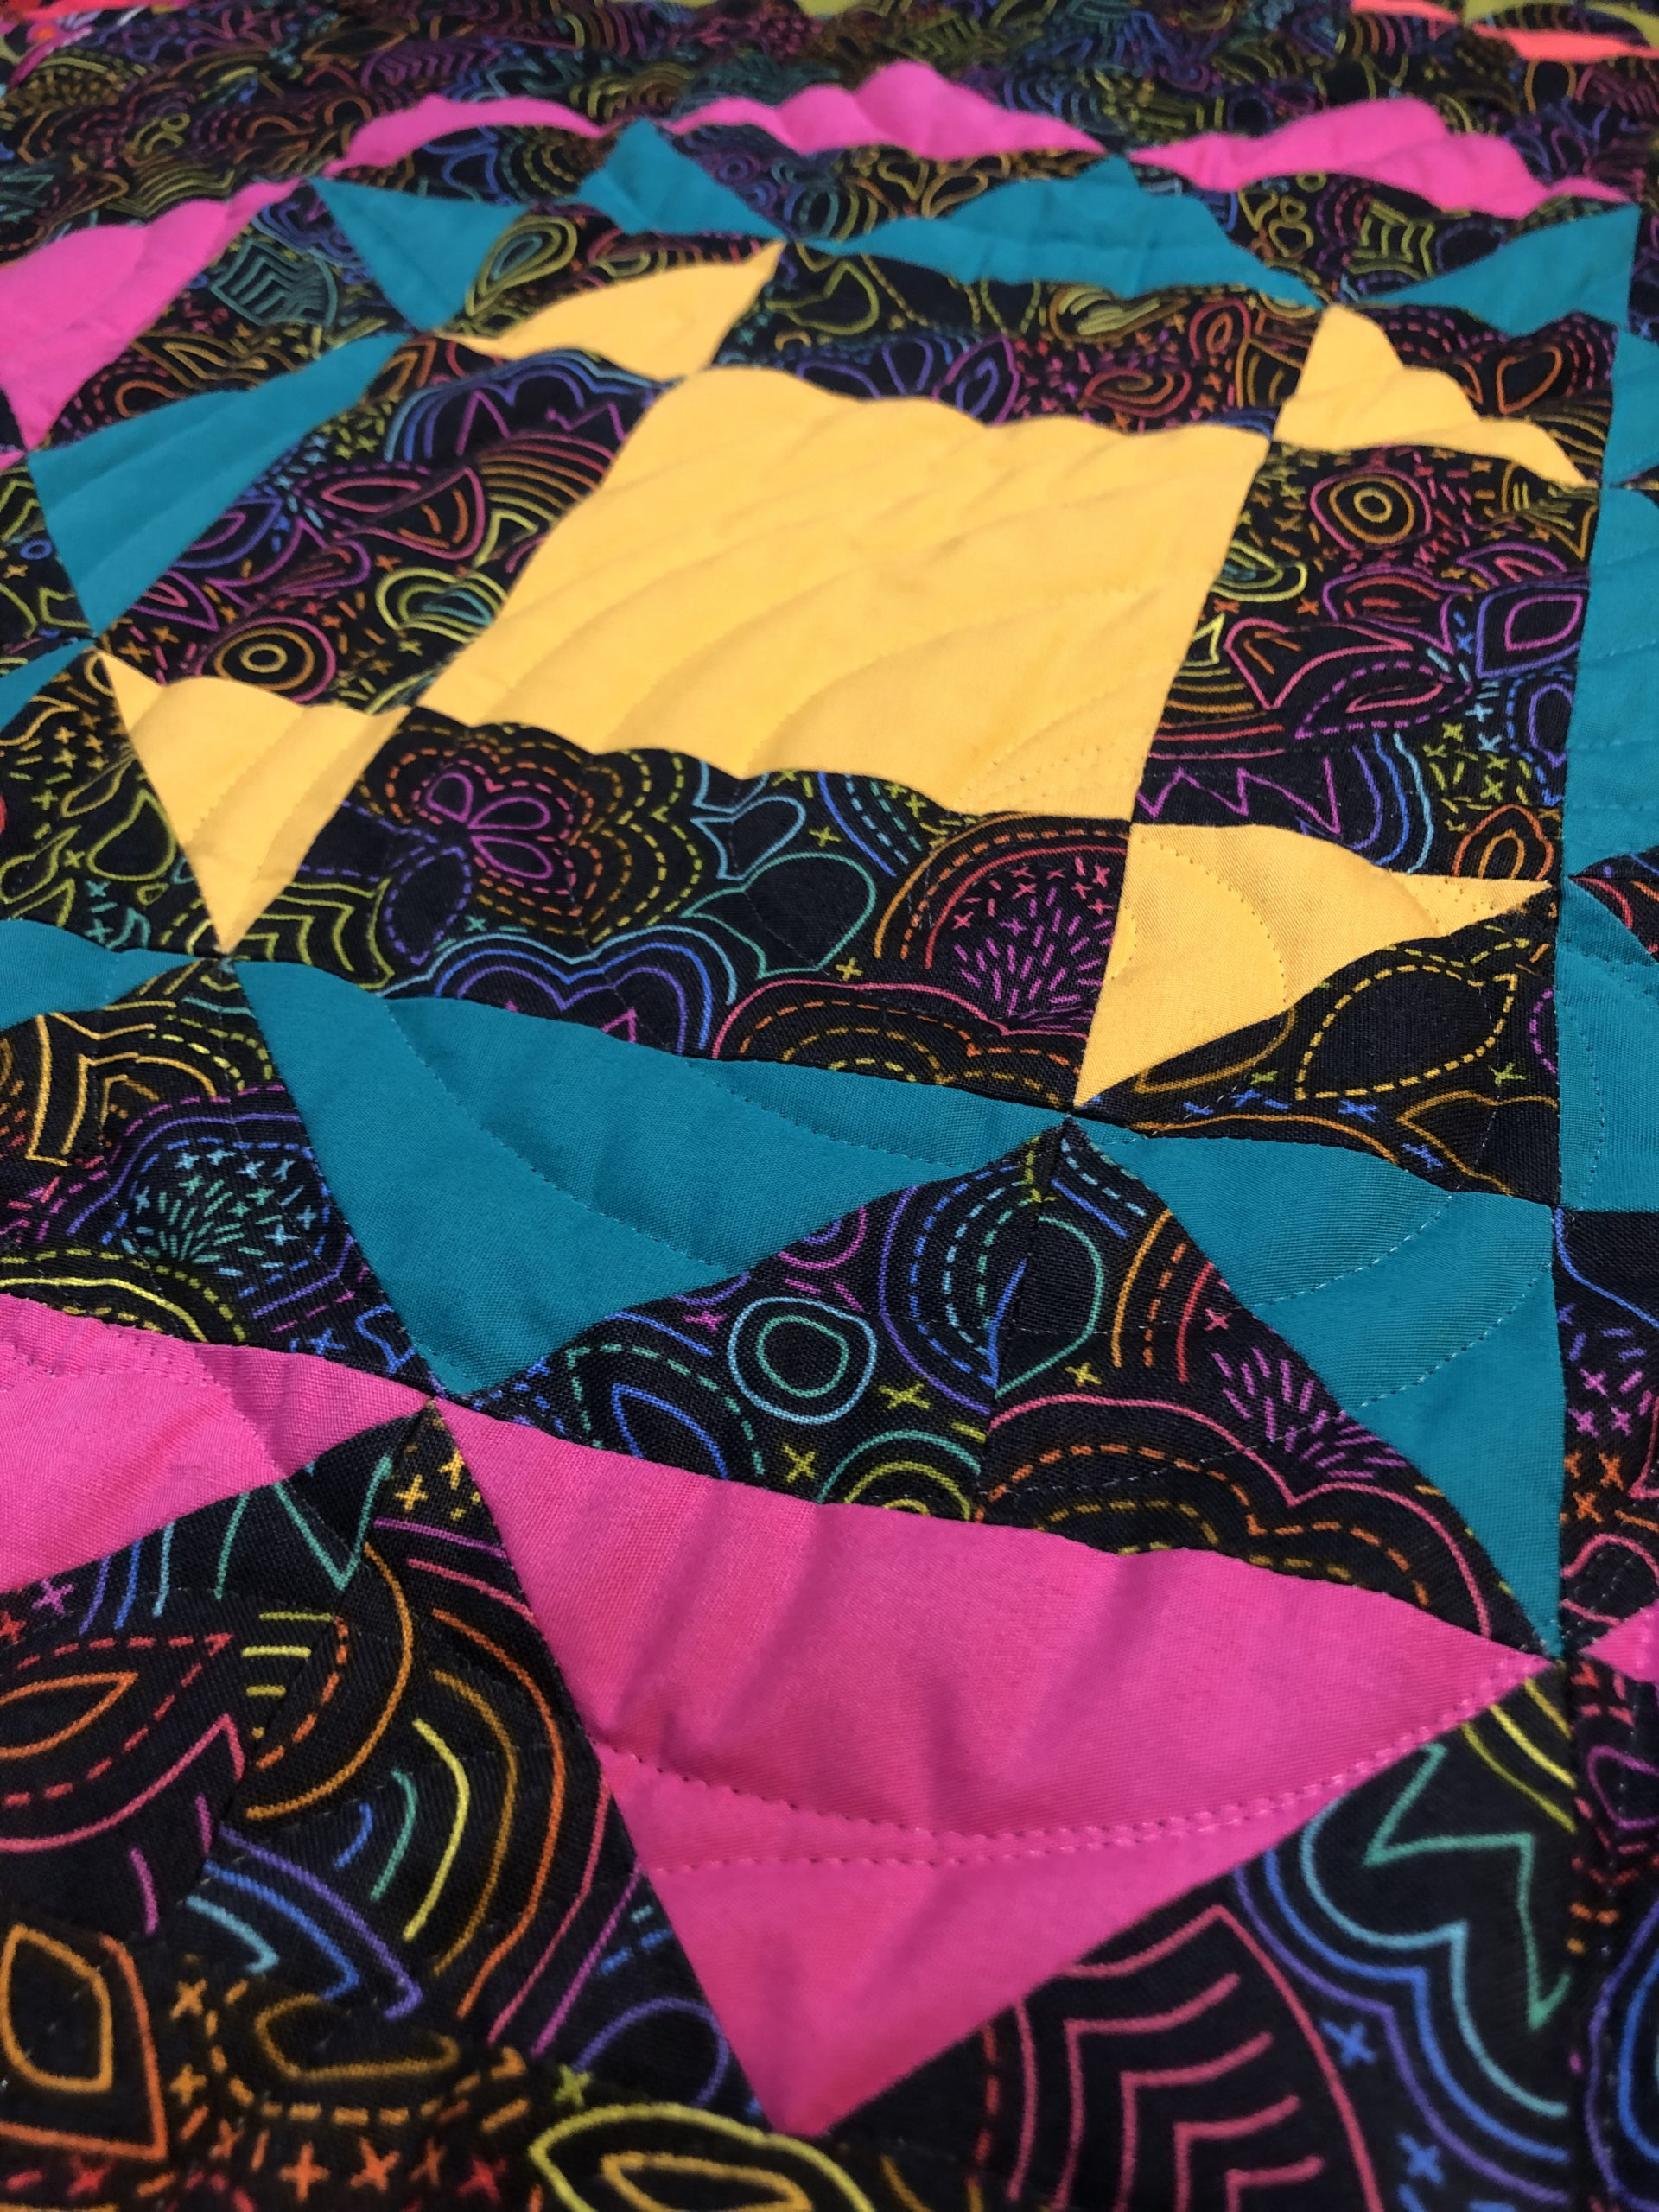
To finish off this masterpiece of fabric mixing, I decided to go with a monofilament thread, to ensure there was no clashing with the many colors and patterns included in the fabrics. I chose a Karlee Porter digital design and used a wool batting for extra texture.
The backing and binding are also a part of the Alison Glass fabric collection and helped providing the perfect finish to this piece.